
Main Courses
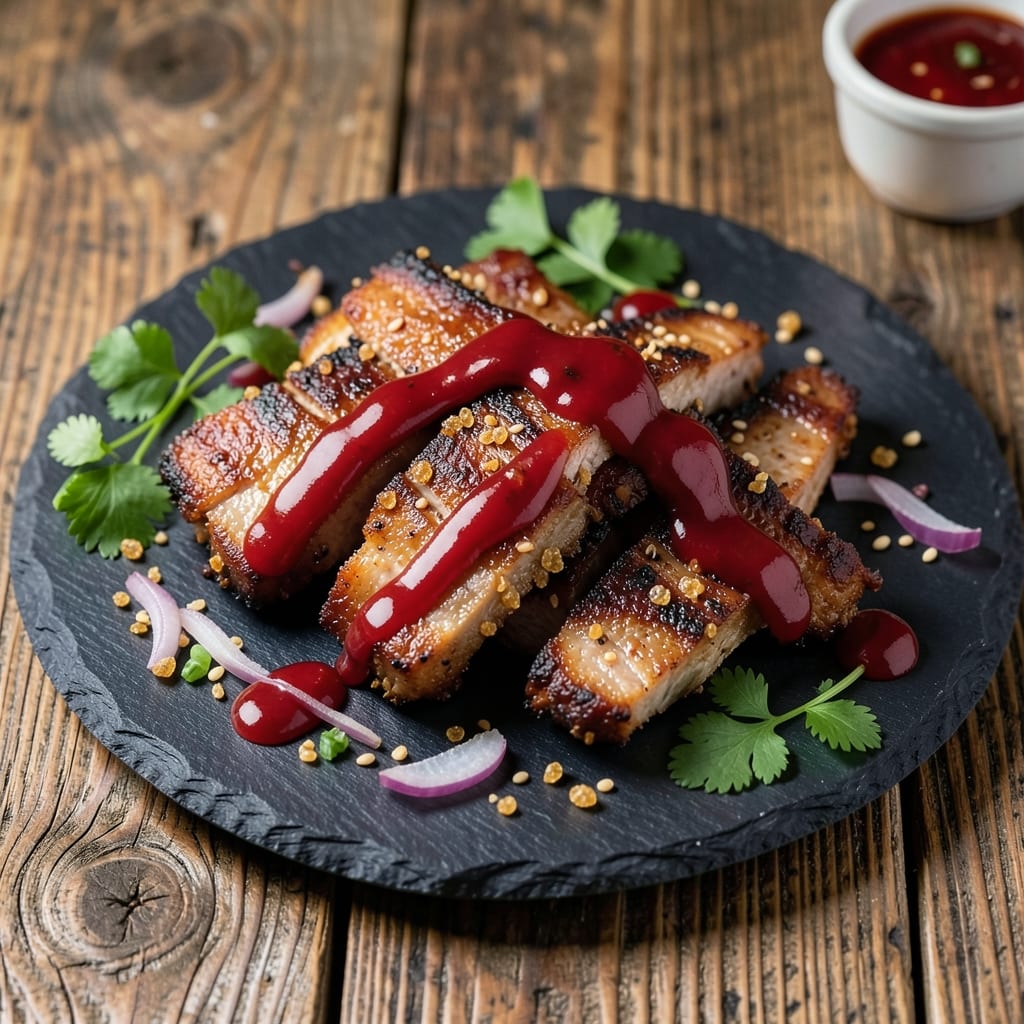
This BBQ pork strips recipe delivers the perfect balance of crispy-cracked bark and sticky-sweet glaze that'll have your guests begging for seconds. I've been perfecting this technique for years, blending my French training with classic pitmaster methods to create pork strips that are tender inside, crispy outside, and packed with smoky-sweet flavor. The secret lies in a dry rub that develops deep flavor while keeping the meat juicy, followed by a honey-mustard glaze that caramelizes beautifully over the heat.
What sets this recipe apart is the two-stage cooking process—first searing the strips to lock in juices, then finishing them with the glaze for that restaurant-quality sheen. I use a mix of brown sugar and smoked paprika in the rub, which creates that signature bark while adding layers of complexity. The glaze isn't just sweet; it's got a tangy kick from Dijon mustard that cuts through the richness. This method ensures your pork stays moist and flavorful even after hours on the grill.
By the time you're done, you'll have golden, glistening pork strips that are crispy enough to stand up to a toothpick but tender enough to melt in your mouth. The glaze clings to every strip, creating a perfect balance of sweet, smoky, and slightly tangy flavors. These strips are perfect for serving on buns, over a bed of coleslaw, or as a main course with grilled vegetables. The best part? They're ready in under 45 minutes—fast enough for a weeknight dinner but impressive enough for company.
For those who love to experiment, I've included variations like adding chipotle powder for heat or swapping the honey for maple syrup. The key is keeping the cooking method consistent—high heat for crispiness, low and slow for tenderness. Let's get started on these showstopping BBQ pork strips that'll make your grill the center of attention.
Ingredients for bbq pork strips
These 13 ingredients transform simple pork strips into showstopping BBQ magic—crispy outside, tender inside, and dripping with sticky-sweet glaze.
| Ingredient | Amount | Notes |
|---|---|---|
| Boneless Pork Shoulder Strips 🥓 | 1 ½ lb | Cut 1-inch thick for even cooking |
| Brown Sugar 🍚 | ½ cup | Packed, light or dark |
| Smoked Paprika 🌶️ | 2 tbsp | For deep smoky flavor |
| Granulated Garlic 🧄 | 1 tbsp | Or 3 fresh cloves minced |
| Ground Black Pepper 🌶️ | 1 tsp | Freshly cracked for bite |
| Kosher Salt 🧂 | 1 tsp | Diamond Crystal preferred |
| Dijon Mustard 🍯 | 2 tbsp | For tangy glaze base |
| Honey 🍯 | ¼ cup | Wildflower for complexity |
| Apple Cider Vinegar 🍎 | 1 tbsp | Balances sweetness |
| Olive Oil 🫒 | 2 tbsp | For searing and glaze |
| Yellow Onion 🧅 | 1 whole | Finely diced for glaze |
| Chipotle Powder 🔥 | ½ tsp | Optional for heat lovers |
| Fresh Cilantro 🌿 | ¼ cup | Chopped for garnish |
The pork shoulder is your star—look for well-marbled cuts at Costco or Whole Foods for the best flavor. Cut it into 1-inch strips yourself for even cooking, or ask your butcher to do it (they'll often do it free!). The brown sugar is non-negotiable—it creates that signature bark while keeping the meat moist. Domino or C&H brands work perfectly. For the smoked paprika, Penzeys or the bulk bins at Trader Joe's have the best quality. Fresh cilantro? Mexican markets have the brightest, most flavorful bunches—worth the trip if you're nearby.
No smoked paprika? Regular paprika plus a pinch of liquid smoke works in a pinch. Short on honey? Maple syrup or agave keeps things vegan-friendly. The Dijon mustard can be swapped for regular yellow mustard, but you'll lose that sophisticated tang. For the glaze, substitute apple juice for vinegar if you prefer less acidity. The chipotle powder is optional but adds that smoky heat that takes these from good to restaurant-quality. If you're making a big batch, double the glaze ingredients—it disappears fast once on the strips!
Store the dry rub in an airtight container for up to 3 months—it gets better with age. The glaze keeps in the fridge for 1 week or freezes for 3 months. Cooked pork strips reheat beautifully—450°F for 5-7 minutes in the oven with a splash of water to restore crispiness. For meal prep, assemble the glaze ahead and store separately. The strips themselves? Eat within 2 days for best texture—leftovers get tender but lose that perfect crunch.
Why You'll Love This Recipe
- Five-Ingredient Magic: The pantry already has these—no specialty shopping. Brown sugar and smoked paprika alone transform those pork strips into something irresistible with almost no effort.
- Sweet-Smoky Crunch: That caramelized edge from the brown sugar? It’s the kind of crispy-sweet contrast that makes you reach for seconds without thinking. The garlic and black pepper tie it all together like a perfect hug of flavor.
- Lunchbox Hero: Pack these cold or reheated—they’re just as good. My kids grab them for school lunches, and honestly? I’ve been known to sneak a strip or two from their bags. (Don’t tell them.)
- Budget Stretch: A pound of pork shoulder feeds four, and the spices cost pennies. Leftovers? Toss them in tacos, salads, or over rice—suddenly, you’ve got three meals for the price of one. Smart, right?
Step-by-step instructions for crispy-cracked BBQ pork strips
Here's how to achieve that perfect balance of crispy bark and sticky-sweet glaze every time.
Prepare the Pork Strips for Maximum Crispiness
Pat the 1.5 lb boneless pork shoulder strips completely dry with paper towels—this is crucial for that crispy bark. I like to press down firmly to remove all moisture, especially in the crevices where it tends to hide. Once dry, season both sides generously with 2 tbsp smoked paprika, 1 tbsp granulated garlic, 1 tsp ground black pepper, and 1 tsp kosher salt. I press the seasoning into the meat so it sticks well.
Let the seasoned strips sit at room temperature for 15-20 minutes while you prep everything else. This ensures even cooking and helps the seasoning penetrate slightly. Pro tip: If you're short on time, just let them sit for 10 minutes—they'll still cook well, though the seasoning might not adhere quite as perfectly.
Sear the Strips for Deep Flavor and Crispy Texture
Heat 2 tbsp olive oil in a large skillet over medium-high heat until shimmering but not smoking. Add the pork strips in a single layer, leaving space between them so they don't steam. Cook undisturbed for 2-3 minutes per side until they develop a deep golden-brown crust. You'll know they're ready when they release easily from the pan—don't rush this step, as it builds that incredible bark.
Once seared, transfer the strips to a plate and set aside. The residual heat will keep them warm while you prepare the glaze. If you notice any excess oil in the pan, wipe it out with a paper towel—you don't want a greasy glaze.
Make the Sticky-Sweet Glaze
In the same skillet (no need to clean it—the browned bits add flavor), add the finely diced 1 whole yellow onion and cook over medium heat for 3-4 minutes until softened. Pour in 2 tbsp Dijon mustard, 0.25 cup honey, 1 tbsp apple cider vinegar, and 0.5 cup brown sugar. Stir well to combine, scraping up any browned bits from the bottom of the pan.
Simmer the mixture for 5-6 minutes until it thickens slightly and coats the back of a spoon. If you added the optional 0.5 tsp chipotle powder, stir it in now for a subtle kick. The glaze should be thick enough to coat the back of a spoon but still pourable—this ensures it'll stick beautifully to the pork.
Glaze and Finish for Perfect Texture
Return the seared pork strips to the skillet and spoon the glaze evenly over them. Cook for 1-2 minutes on each side, just enough to coat the strips thoroughly. The glaze should bubble and stick to the pork, creating that signature sticky finish. If the glaze is too thick, add 1-2 tablespoons of water to loosen it slightly.
Transfer the glazed strips to a serving platter and let them rest for 5 minutes before serving. This resting time allows the juices to redistribute, ensuring each bite is tender and flavorful. Garnish with 0.25 cup chopped fresh cilantro for a bright pop of color and freshness.
Serve Immediately for Maximum Enjoyment
Serve the crispy-cracked pork strips warm, with the glaze pooling beautifully on the plate. The contrast of the crispy exterior and tender interior, paired with the sticky-sweet glaze, makes every bite irresistible. Pair with your favorite sides like coleslaw, cornbread, or a simple green salad to round out the meal.
Real talk: These strips are best served immediately, but if you need to reheat, do so in a 350°F oven for 5-7 minutes to maintain that crispy texture. Enjoy your perfectly balanced BBQ pork strips—crispy, sticky, and packed with flavor!
Pro Tips For Making Bbq Pork Strips
- PREP STRIPS UNEVENLY: Cut the pork shoulder into strips of varying thickness—some thick, some thin. This ensures some pieces finish faster while others stay juicy longer, so you’re not left with dry chunks or undercooked slabs. (Yes, it looks messy, but it works every time.) ---
- SEAR IN BATCHES: Don’t crowd the pan. Cook the pork strips in two batches over medium-high heat until they brown deeply—about 2-3 minutes per side. Overcrowding steams them instead of searing, and you’ll end up with soggy, flavorless strips. ---
- SWEAT THE GARLIC: Before adding the pork, cook the granulated garlic in the same pan for 30 seconds until it fragrant. It’s a tiny step, but it deepens the flavor more than just sprinkling it dry. (I know, it’s easy to skip—but don’t.) ---
- REST UNDER FOIL: After cooking, dump the strips onto foil and tent them loosely for 5 minutes. This keeps them warm while letting any residual moisture redistribute, so they don’t turn into chewy rubber when you serve. (Your future self will notice the difference.)
Pro cooking tips for this dish
Dry Rub Mastery
Your dry rub isn't just seasoning—it's the flavor foundation. I like to mix my brown sugar and smoked paprika in a bowl first to distribute evenly, then press it firmly into the meat. For extra adhesion, lightly mist the strips with olive oil spray before applying the rub. The key is patience: let the seasoned strips sit for 15-20 minutes at room temperature. This step makes all the difference in flavor penetration and bark development. 🌶️
Searing Secrets
Don't crowd the pan—this is where most home cooks go wrong. Use a 12-inch cast iron skillet (like my trusty Lodge) and cook strips in batches if needed. The magic happens at medium-high heat—you want that oil shimmering but not smoking. I flip mine only once per side for 2-3 minutes, letting the natural juices render slowly. Overcrowding steams the meat instead of searing it, ruining that crispy texture. Trust me, this step is worth the wait.
Glaze Consistency
The perfect glaze should be like honey—thick enough to coat but still pourable. If yours is too thick, add 1 tbsp water at a time until it reaches that ideal consistency. I like to taste-test the glaze before applying it to the pork—it should balance sweet, tangy, and smoky notes. For extra depth, deglaze the pan with 2 tbsp apple cider vinegar before adding the other ingredients. This adds complexity that store-bought glazes can't match. The glaze should bubble vigorously when applied—this ensures maximum stickiness and caramelization.
Two-Zone Grill Hack
If you're grilling outdoors, set up a two-zone fire with one side hot and one side medium. Sear the strips over the hot zone, then move them to the cooler side to apply the glaze. This gives you better temperature control and prevents burning. For indoor cooking, use a grill pan over medium heat—it mimics the grill lines while keeping your kitchen cooler. The key is maintaining that 350-400°F range throughout the glaze application to ensure even cooking and maximum caramelization. ✨
Resting Matters
Never skip the 5-minute rest—this is where the juices redistribute, ensuring each bite is tender. I like to tent the strips loosely with foil during resting to keep them warm without steaming. For extra crispiness, broil them for 1-2 minutes at the end, watching closely to avoid burning. The glaze will thicken slightly during resting, creating that perfect sticky finish. This step transforms good pork into showstopping pork—don't rush it!
Reheating Like a Pro
Leftovers happen, and reheating these strips right is crucial. I use a 350°F oven for 5-7 minutes with a splash of water in the pan to restore moisture. For a quick fix, reheat in a non-stick skillet over medium heat for 2-3 minutes per side until crispy again. The goal is to revive that crispy exterior without drying out the interior. Store cooked strips in an airtight container with a paper towel on top to absorb excess moisture—this keeps them crispy for up to 2 days**. 💡
Nutrition facts
Frequently asked questions
Can I use pork loin instead of pork shoulder for this recipe?
Yes, but with one key adjustment! Pork loin is leaner than pork shoulder, so it cooks faster and can dry out more easily. Cut it ½-inch thick instead of 1-inch, reduce cooking time by 1-2 minutes per side, and keep the heat at medium-high to prevent overcooking. The glaze will still work beautifully—just watch those strips closely.
How do I keep the pork strips crispy when reheating?
Reheating is all about the method! Use a non-stick skillet over medium heat for 2-3 minutes per side—just enough to restore crispiness without overcooking. For oven reheating, broil at 450°F for 3-4 minutes with a splash of water in the pan. Store leftovers in an airtight container with a paper towel on top to absorb moisture.
What's the best way to store leftover pork strips?
Store cooked strips in an airtight container with a paper towel on top to absorb excess moisture. They'll stay crispy for up to 2 days in the fridge. For longer storage, freeze them for 3 months—thaw overnight in the fridge before reheating. The glaze keeps separately in the fridge for 1 week or freezes for 3 months.
Can I make this recipe without a grill or grill pan?
A cast iron skillet works perfectly—just use medium-high heat and cook in batches to avoid overcrowding. For an oven method, bake at 400°F for 12-15 minutes on a wire rack over a baking sheet (this prevents steaming). The glaze application stays the same—just add it during the last 2 minutes of cooking.
How do I adjust the glaze for spicier flavors?
For heat lovers, add ½ tsp cayenne powder or 1 tsp chipotle powder to the glaze while simmering. For smoky heat, swap ½ tbsp of the honey for ½ tbsp liquid smoke**.