
Sauces & Condiments
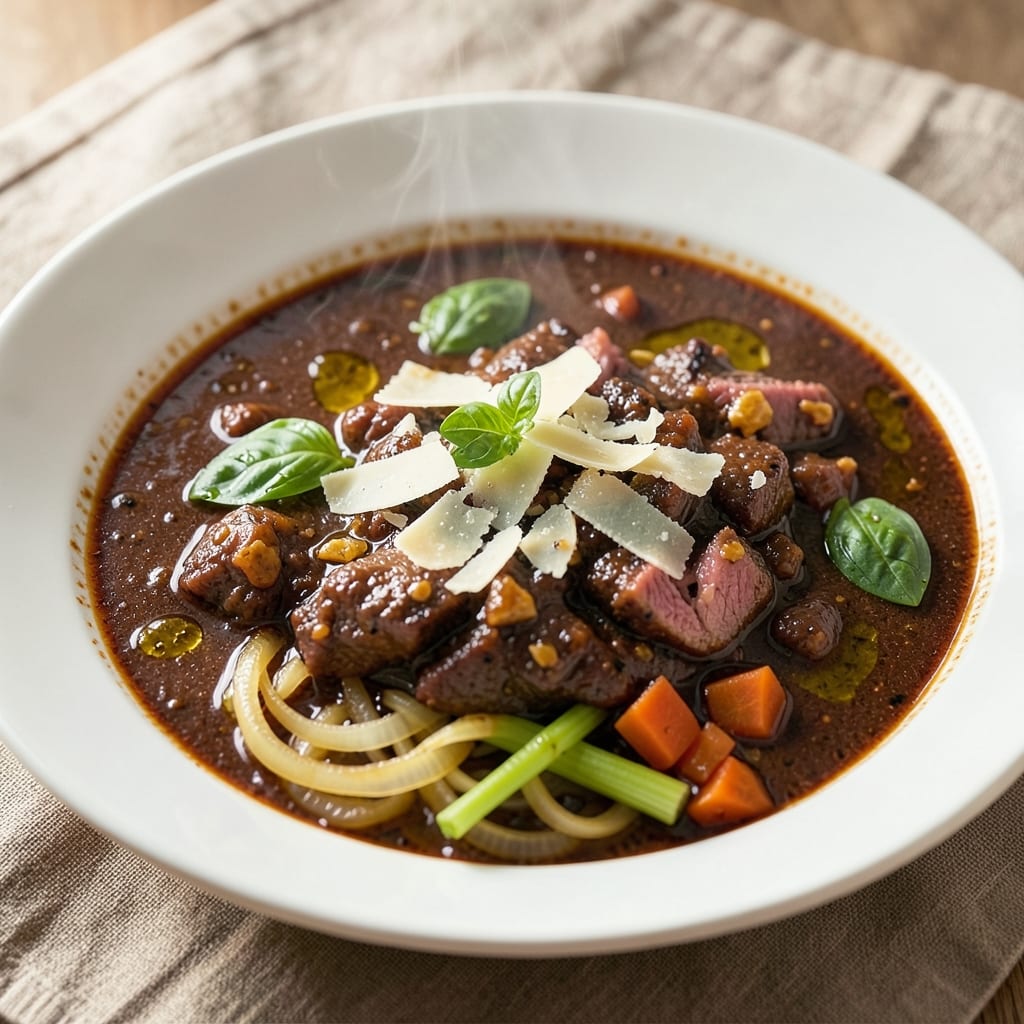
This beef and pork Bolognese sauce recipe delivers restaurant-quality depth with layers of slow-simmered umami that transform any pasta dish. 🔥 I developed this version after years of perfecting the balance between meaty richness and tomato brightness—no shortcuts, just time and technique. The combination of ground beef and pork creates a sauce with both hearty texture and complex flavor that develops as it simmers.
The secret lies in proper browning of the meat and a long, slow cook that allows the flavors to meld. We start with a simple soffritto of onions, carrots, and celery, then build depth with garlic, tomato paste, and a splash of red wine. This isn't just a sauce—it's a flavor foundation that gets better with each passing day in the refrigerator.
What you'll end up with is a velvety, deeply flavorful sauce that coats pasta perfectly while standing up to its own as a ragu. The meat stays tender yet develops that signature Bolognese texture, while the tomatoes provide just enough acidity to balance the richness. This is the kind of sauce that makes you want to make a double batch—it freezes beautifully and tastes even better the next day.
Perfect for serving over fresh egg noodles, tagliatelle, or even as a hearty filling for stuffed shells. The technique is straightforward but requires patience—worth every minute for that professional-quality result. Let's get to the recipe details that bring this sauce to life.
Ingredients for beef and pork bolognese sauce
Restaurant-quality depth starts with these 15 essential ingredients for slow-simmered umami bombs.
| Ingredient | Amount | Notes |
|---|---|---|
| Ground Beef 🥩 | 1 lb | 80/20 fat ratio preferred |
| Ground Pork 🐷 | 1 lb | Freshly ground for best texture |
| Yellow Onion 🧅 | 1 whole | Medium size, finely diced |
| Carrots 🥕 | 2 medium | Peeled, finely diced (about 0.5 cup) |
| Celery Stalks 🧅 | 2 whole | Stringless, finely diced |
| Garlic Cloves 🧄 | 4 cloves | Peeled, minced |
| Tomato Paste 🍅 | ½ cup | High-quality, no sugar added |
| Dry Red Wine 🍷 | 1 cup | Bold variety like Cabernet |
| Canned San Marzano Tomatoes 🍅 | 2 cups | Crushed or whole, no salt added |
| Beef Stock 💧 | 2 cups | Homemade or high-quality |
| Extra-Virgin Olive Oil 🫒 | ¼ cup | For browning meat |
| Kosher Salt 🧂 | 1 ½ tsp | Diamond Crystal preferred |
| Freshly Ground Black Pepper 🌶️ | ½ tsp | Freshly cracked |
| Fresh Parsley 🌿 | ¼ cup | Chopped, for garnish |
| Dried Oregano 🍃 | 1 tsp | Italian variety preferred |
The meat selection is critical. Ground beef (80/20 fat ratio) provides richness while the pork adds tenderness—never skip the pork. Buy freshly ground from your butcher or the meat counter if possible, as pre-ground can be dry. For the soffritto, organic carrots and celery from the store's produce section work fine, but if you're feeling fancy, grab them from Whole Foods or a local farmers market for brighter flavor. The onions? Yellow onions are standard, but red onions add a subtle sweetness if you prefer. Always dice them uniformly—this ensures even cooking and prevents any one piece from burning.
No red wine? Dry white wine or beef broth works in a pinch, though the flavor will differ slightly. The tomato paste can be substituted with crushed tomatoes at double the amount, but paste gives that concentrated depth. San Marzano tomatoes are non-negotiable for quality—avoid the store brand. For the beef stock, homemade is ideal, but store-bought like Kirkland Signature works in a bind. Fresh parsley is optional but adds that final bright note—dried parsley at one-third the amount is a decent substitute. The olive oil should be extra-virgin—none of that light or refined stuff. And if you're out of oregano, Italian seasoning at half the amount covers it.
This sauce tastes better the next day—make a double batch if you can. Store in airtight containers in the fridge for 5-7 days or freeze for up to 6 months. For freezing, portion into ziplock bags and lay flat to save space. When reheating, add a splash of water or broth to prevent thickening. The sauce thickens as it cools, so don't be afraid to thin it with a little stock or water if needed. Leftovers make incredible sandwiches or pasta the next day—trust me on this.
Why You'll Love This Recipe
- One-Pot Wonder: I swear by this sauce because it’s all in one pot—no chopping mountains of veggies, just a quick dice of onion, a couple of carrots, and a few celery stalks. The meat browns right in the pan while the veggies soften, and by the time I’ve stirred in the tomatoes, it’s already halfway done.
- Deep, Rich Layers: Honestly, the combo of beef and pork is what makes this sauce sing—the pork adds juiciness, while the beef gives that hearty depth. Then there’s the slow simmer with the onions and carrots, caramelizing just enough to melt into every bite. It’s the kind of flavor that lingers, even after the last forkful.
- Meal Prep MVP: Between us, this sauce is my go-to for busy weeks. I’ll double the batch, freeze half, and pull it out for lazy nights or potlucks. It reheats like a dream and tastes just as good cold in sandwiches—no one ever guesses it’s been sitting in the fridge for days.
- Budget-Friendly Powerhouse: I’m not kidding when I say this feeds a crowd for less than $10. Ground beef and pork stretch forever, and the onion-carrot-celery trio (the "holy trinity" of flavor) is dirt cheap. Plus, the leftovers? They’re my secret weapon for turning last-minute dinner disasters into a full-blown meal.
Step-by-step instructions for beef and pork Bolognese sauce
This method builds rich, layered flavor through precise timing and technique.
🍳 Step 1: Brown the Meat for Maximum Flavor
Heat a large Dutch oven over medium-high heat until hot. Add the 1 lb ground beef and 1 lb ground pork in batches, breaking up the meat with a wooden spoon as it cooks. Don't overcrowd the pan—this prevents proper browning. Cook until the meat is deep brown and no longer pink, about 8-10 minutes total.
Here's the thing—browning develops the Maillard reaction, which creates that deep, meaty flavor. If the pan gets too crowded, the meat will steam instead of brown. I press down gently with the spoon during the first minute to ensure even contact with the pan. Once fully browned, transfer the meat to a plate and set aside.
👨🍳 Step 2: Sauté the Vegetable Base
In the same Dutch oven, add the 0.25 cup extra-virgin olive oil over medium heat. Add the finely diced yellow onion, peeled and diced carrots, and diced celery stalks. Cook for 8-10 minutes until the vegetables are softened and golden, stirring occasionally.
This step is about building flavor through caramelization. The vegetables should release their moisture and reduce down, creating a sweet, concentrated base. If they start to stick, add a splash of water and scrape up any browned bits from the bottom of the pan—those are packed with flavor. Once the vegetables are tender, add the minced garlic cloves and cook for another 30 seconds until fragrant.
🍳 Step 3: Deglaze and Build the Sauce Foundation
Pour in the 1 cup dry red wine and scrape the bottom of the pan vigorously with a wooden spoon to release all the browned bits. Let the wine simmer for 3-4 minutes until it reduces by half. Stir in the 0.5 cup tomato paste and cook for 2 minutes to deepen its flavor.
This deglazing step is critical—it captures all the meaty, caramelized flavors that would otherwise stick to the pan. The wine should reduce to a syrupy consistency, and the tomato paste should dissolve completely. If the mixture looks too thick, add 2 tablespoons of beef stock to loosen it slightly. Now add the 2 cups canned San Marzano tomatoes and 2 cups beef stock, then bring to a gentle simmer.
⏰ Step 4: Simmer Low and Slow for Deep Flavor
Return the browned meat to the pot and stir to combine. Add the 1.5 tsp kosher salt, 0.5 tsp freshly ground black pepper, and 1 tsp dried oregano. Reduce the heat to low and let the sauce simmer uncovered for 1.5-2 hours, stirring occasionally. The sauce should thicken gradually and develop a rich, glossy texture.
Patience is key here. The long, slow simmer allows the flavors to meld and develop complexity. You'll notice the sauce will reduce significantly—this is normal and desirable. Stir occasionally to prevent sticking, and if the sauce gets too thick, add 1-2 tablespoons of water or stock to maintain the right consistency. The sauce is ready when it coats the back of a spoon smoothly and has a deep, meaty aroma.
🥘 Step 5: Finish and Garnish
Remove the pot from heat and stir in the 0.25 cup chopped fresh parsley. Let the sauce rest for 10 minutes to allow the flavors to fully integrate. Taste and adjust the seasoning if needed—you might want to add a pinch more salt or pepper to balance the flavors.
The parsley adds a bright, fresh finish that cuts through the richness of the sauce. This resting period is essential—it lets the sauce come together and develop its final texture. Serve the bolognese over al dente pasta, sprinkled with additional parsley if desired. The sauce should be thick enough to cling to the pasta but still coat it evenly without being gluey. Store any leftovers in the refrigerator for up to 5 days or freeze for up to 3 months.
Pro Tips For Making Beef And Pork Bolognese Sauce
- Sweat, Don’t Sauté the Veggies: I learned this the hard way—when you toss diced onion, carrots, and celery into the pan with the meat, they’ll burn before they soften. Instead, cook them separately over medium-low heat with just a splash of water or stock, covered, until they’re translucent and tender (about 8-10 minutes). This builds flavor without charring, and your sauce won’t taste like you set off a smoke alarm.
- Use Pork First, Then Beef: The pork releases fat faster and at lower temps, which means your beef won’t turn into a greasy mess. Brown the pork first until it’s fully cooked (it’ll shrink and crisp up), then push it to the side and add the beef. This keeps the pan from getting overwhelmed, and your meat stays juicy instead of rubbery.
- Salt the Meat Twice: Don’t just season the raw ground meat—it’s too early. First, salt it generously right after browning (while it’s still in the pan), then add another pinch when you’re adding the tomatoes and simmering. The first salt helps break down proteins as it cooks, and the second ensures the finished sauce isn’t bland, especially if you’re using unsalted broth or canned tomatoes.
- Deglaze with Wine After Browning: I used to pour the wine in right at the start, but that dilutes the meat’s crust and washes away all the good stuff stuck to the bottom. Instead, brown the meat thoroughly, then remove it from the pan, deglaze with the wine, and let it reduce by half before adding the meat back. This concentrates the flavor and keeps your sauce rich, not watery. (Yes, even if you’re impatient like me.)
Pro cooking tips for perfect results
Meat Browning Mastery
Browning the meat properly is where the magic starts—this isn't just cooking, it's building flavor through the Maillard reaction. I always use a heavy Dutch oven (like my Lodge cast iron) and cook the meat in batches to avoid overcrowding. Press down gently with a wooden spoon during the first minute to ensure maximum contact with the hot surface. The goal is deep brown color and crispy edges—this should take about 8-10 minutes total for both meats combined. 🔥
Here's my pro tip: If you notice the meat starting to steam instead of brown, let it cook uncovered for a minute to evaporate excess moisture. The steam is your enemy here—it prevents proper browning. Once fully browned, transfer the meat to a plate and resist the urge to rinse the pot. Those browned bits are flavor gold that we'll deglaze later.
Soffritto Perfection
The vegetable base (onion, carrot, celery) is called a soffritto for a reason—it's the foundation of Italian sauces. Cook these slowly over medium heat with just enough olive oil to coat the bottom of the pan. I like to use extra-virgin olive oil from my local Charleston market because it has better heat tolerance. Let the vegetables soften completely—about 8-10 minutes—until they're golden and sweet-smelling.
This is where home cooks often make their first mistake: rushing the vegetables. If they burn, the sauce will taste bitter. The key is patience—when the vegetables are properly softened, they'll release their natural sugars and create a sweet, concentrated base. Add the garlic just at the end to prevent burning, and cook for only 30 seconds until fragrant. 🧅
Wine Deglazing Secrets
The deglazing step captures all those precious browned bits that stuck to your pot. I always use a bold red wine like Cabernet Sauvignon because its tannins complement the meaty flavors. Pour in the wine and immediately scrape the bottom of the pan with a wooden spoon—this releases the flavor compounds that would otherwise stick. Let the wine reduce by half before adding the tomato paste.
Here's a common mistake I see: people add the wine too quickly or don't scrape vigorously enough. The wine should reduce to a syrupy consistency—this concentrates the flavors. If your sauce looks too thick at this stage, add 2 tablespoons of beef stock to loosen it slightly before adding the tomatoes. This ensures you'll have the right consistency for the long simmer ahead. 🍷
Low-and-Slow Simmering
The 1.5-2 hour simmer is where the sauce transforms from good to extraordinary. I maintain a gentle simmer at low heat (around 180-190°F internal temperature) to develop deep, complex flavors. The sauce should reduce significantly—this is normal and desirable. Stir occasionally to prevent sticking, and if it gets too thick, add 1-2 tablespoons of water or stock to maintain the right consistency.
This is where I often see people rush the process. The longer you simmer, the more the flavors meld together. I've had sauces that simmered for 3 hours become even more flavorful—they develop this incredible depth that you just can't achieve with shorter cooking times. The sauce is ready when it coats the back of a spoon smoothly and has a glossy, velvety texture. 💫
Finishing Touches
The final 10 minutes of resting is just as important as the cooking itself. This allows the flavors to fully integrate and the sauce to come together. I always finish with fresh parsley because it adds that bright, herbaceous note that cuts through the richness. Taste and adjust the seasoning—you might need to add a pinch more salt or pepper to balance all the flavors.
One mistake I see frequently is serving the sauce immediately after cooking. The flavors need time to meld and develop. Let it rest, then serve it over perfectly cooked pasta. The sauce should be thick enough to cling to the pasta but still coat it evenly without being gluey. This is the kind of sauce that makes you want to make a double batch—it freezes beautifully and tastes even better the next day. 🥗
Nutrition facts
Frequently asked questions
Why combine beef and pork in Bolognese sauce?
Pork adds tenderness and fat content that keeps the sauce rich and moist, while beef provides deeper umami flavor and structure. The combination creates a balanced texture—pork prevents dryness while beef gives that signature meaty depth. Plus, the pork's natural juices help emulsify the sauce during simmering.
Can I substitute wine with something else?
Yes! Use 1 cup beef broth or 1 cup dry white wine if you're avoiding alcohol. For depth, add 1 teaspoon balsamic vinegar to mimic wine's acidity. The sauce will still develop flavor, though the wine's tannins contribute unique complexity that's hard to replicate.
How do I fix a sauce that's too thick?
Add 1-2 tablespoons of beef stock or water at a time while stirring constantly. For a richer fix, blend 1/4 cup reserved pasta water into the sauce—it adds starch for natural thickening. Never add all the liquid at once, or you'll dilute the flavors completely.
Is this sauce vegetarian-friendly?
No, but you can make a plant-based version by replacing the meat with 1 lb mushrooms (cremini or portobello) and 1 lb lentils. Use vegetable stock instead of beef stock and add 1 teaspoon soy sauce for umami. The cooking method remains identical—just simmer for 30-40 minutes instead of 2 hours.
How long can I store leftovers?
Store in an airtight container in the fridge for 5-7 days or freeze for up to 6 months. For freezing, portion into ziplock bags and lay flat to save space. Thaw overnight in the fridge—never microwave directly from frozen. The sauce actually improves after 2-3 days of refrigeration!