
Main Courses
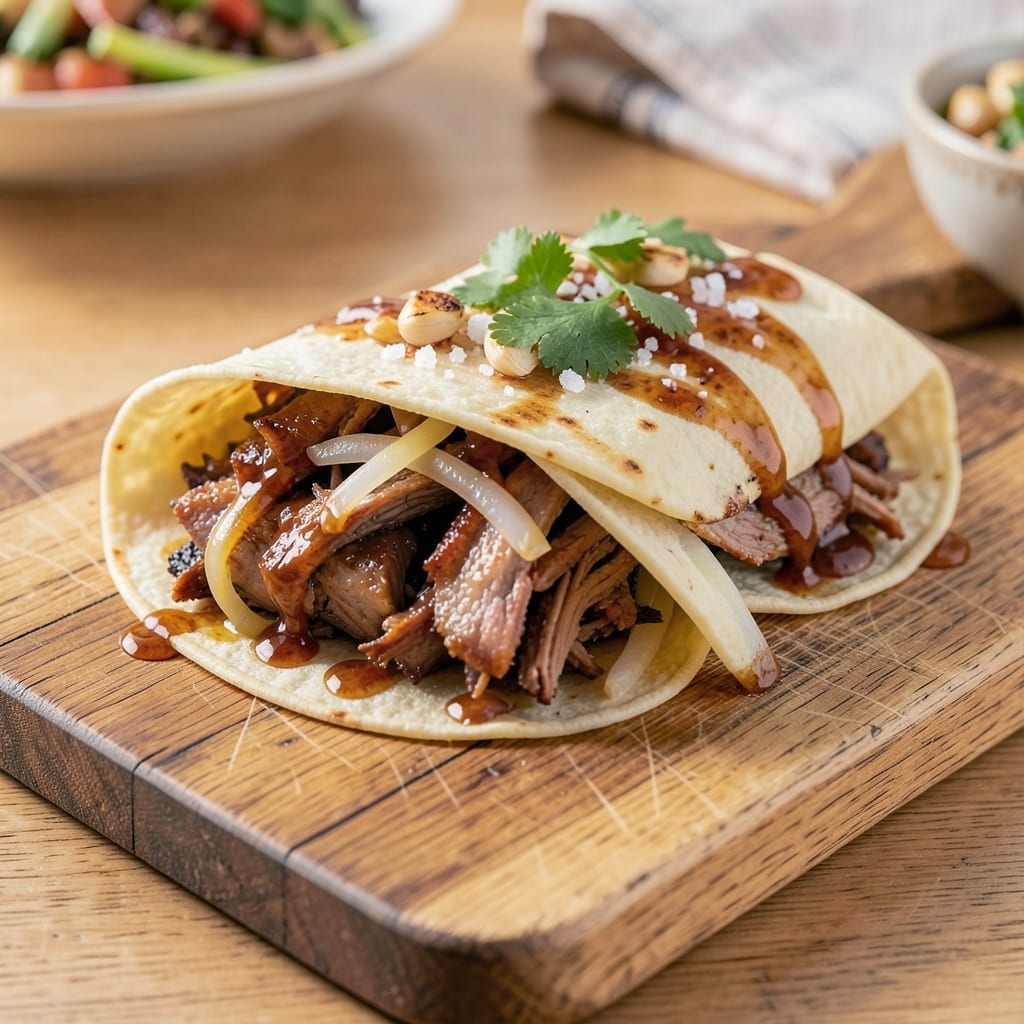
This BBQ pulled pork wrap recipe transforms a classic slow-cooked favorite into handheld perfection—juicy pork, gooey cheese, and crunchy toppings wrapped in a warm tortilla. 🔥 The secret lies in tenderizing the pork low and slow, then finishing it with a tangy-sweet sauce that clings to every bite. I've been perfecting this technique for years, and it never fails to impress even the pickiest eaters.
The magic happens when you combine perfectly shredded pork with melted cheddar and a crisp tortilla—each element needs to be just right. The slow-cooked pork stays moist and flavorful, while the tortilla toasts up to the perfect balance of flexibility and structure. This recipe delivers restaurant-quality results without the fuss of a full meal prep.
What you'll end up with is a wrap that's packed with smoky, savory pork, creamy cheese, and fresh crunch from coleslaw or pickles. The combination of textures and flavors makes every bite satisfying, whether you're feeding a crowd or just craving a hearty lunch. The best part? It's easy to customize with your favorite toppings.
Serve these wraps with a side of cornbread or chips for the full BBQ experience. The slow-cooked pork can be made ahead, so you can spend your day enjoying the cookout instead of standing over the grill. Let's get started on creating these delicious, handheld masterpieces!
Ingredients for bbq pulled pork wrap
Six ingredients for the pork, six for the wraps—just good stuff for handheld BBQ magic.
| Ingredient | Amount | Notes |
|---|---|---|
| Pork Shoulder 🥩 | 4 lb | Bone-in for flavor, cut into chunks |
| BBQ Sauce 🍯 | 2 cups | Store-bought or homemade, tangy-sweet |
| Yellow Onion 🧅 | 1 whole | Medium size, sliced |
| Garlic Cloves 🧄 | 6 cloves | Minced for depth of flavor |
| Apple Cider Vinegar 🍏 | ¼ cup | For tangy brightness |
| Brown Sugar 🍚 | ½ cup | Packed, for caramelized sweetness |
| Smoked Paprika 🌶️ | 1 tbsp | For that smoky BBQ vibe |
| Large Flour Tortillas 🌯 | 12 whole | Burrito-size, warmed for flexibility |
| Sharp Cheddar Cheese 🧀 | 2 cups | Shredded, for gooey perfection |
| Coleslaw Mix 🥬 | 3 cups | Pre-shredded, for crunch |
| Pickle Chips 🥒 | 1 cup | Diced, for tangy crunch |
| Olive Oil 🫒 | 2 tbsp | For slow-cooking pork |
| Kosher Salt 🧂 | 1 ½ tsp | For seasoning pork |
| Black Pepper 🌶️ | 1 tsp | Freshly ground for heat |
The pork shoulder is non-negotiable here—bone-in gives you that rich flavor. Costco or your local butcher usually have it pre-cut into chunks, which saves time. Look for good marbling, not too much fat, but enough to keep it juicy. I always grab a 4-pound cut for six wraps—it's perfect for a crowd. If you're using a whole shoulder, trim off any excess fat before cooking. The smoked paprika is what gives that authentic BBQ vibe, so don't skimp on quality—Penzeys or the bulk bins at Whole Foods have great options.
No tangy-sweet BBQ sauce? Mix 1 cup ketchup, 1/4 cup apple cider vinegar, 1/4 cup brown sugar, 1 tbsp smoked paprika, and 1 tsp garlic powder. The tortillas are the secret to success—Mission or La Tortilla Factory are my go-tos, but any good flour tortilla works. For the cheese, sharp cheddar is a must—it melts perfectly and adds that tangy kick. Coleslaw mix can be store-bought or homemade, but if you're using pre-shredded, check the bag for any added dressing. The pickle chips add that perfect crunch and tang—Heinz makes the best ones, but any dill pickle chips will do.
The pork stays juicy for 3-4 days in the fridge if stored in its juices, but it tastes even better the next day. Tortillas can be warmed in a dry skillet or microwave for 20 seconds before wrapping. For meal prep, assemble the wraps and wrap them in foil—they'll stay fresh for 1 day in the fridge. Freeze the pork before assembling the wraps for up to 3 months—just thaw and reheat before wrapping.
Why You'll Love This Recipe
- Slow Cooker Magic: I swear by this recipe because it’s hands-off—just dump the pork shoulder, toss in the onion and garlic, and let the slow cooker do the work. By dinner, you’ve got tender, fall-apart meat that practically shreds itself, and the apple cider vinegar keeps it bright, not dry.
- Tangy-Sweet Crunch: That BBQ sauce isn’t just for dipping—it’s the star. The vinegar cuts through the richness of the pork, while the caramelized onions add a deep, jammy sweetness. Wrap it up, and every bite has this perfect balance of smoky, sticky, and just a little tangy.
- Lunchbox Hero: Between us, this is my go-to for meal prep. Shred the pork, mix in a little extra BBQ sauce, and pack it into wraps with tortillas—no reheating needed. My kids grab them for school, and honestly? They come back begging for seconds, even after a full day.
- Budget Stretch: A pork shoulder costs next to nothing compared to pre-shredded pork, and it yields massive portions. I’ve fed six people for under $15, and the leftovers? They’re even better the next day, reheated in a skillet with a splash of vinegar to keep it juicy. Minimal cost, maximum flavor.
Step-by-step instructions for BBQ pulled pork wraps
Here's how to transform your slow-cooked pork into melt-in-your-mouth wraps with perfect texture and flavor.
🔥 Step 1: Slow-Cook the Pork Shoulder to Tender Perfection
Preheat your oven to 300°F. In a large Dutch oven, combine the 4 lb pork shoulder, 2 tbsp olive oil, 1.5 tsp kosher salt, 1 tsp black pepper, and 1 tbsp smoked paprika. Rub it all over the pork until fully coated. This seasoning will create that signature smoky flavor that makes these wraps irresistible.
Place the Dutch oven in the oven and cook for 3 hours uncovered. After this initial cook, remove the pork and shred it using two forks. Return the shredded pork to the Dutch oven along with 2 cups BBQ sauce, 0.5 cup brown sugar, and 0.25 cup apple cider vinegar. Stir everything together and return to the oven for another 1-2 hours until the pork is fork-tender and the sauce has thickened. You'll know it's ready when the pork easily pulls apart and the sauce has a glossy, slightly sticky consistency.
🍳 Step 2: Prepare the Crunchy Slaw Topping
While the pork cooks, make the slaw topping by combining 3 cups coleslaw mix and 1 cup diced pickle chips in a large bowl. This mix gives you that perfect crunch contrast against the tender pork and melty cheese. If you want to add a little extra flavor, toss the slaw with 1 tbsp apple cider vinegar and 1 tsp smoked paprika—just enough to complement the BBQ flavors without overpowering them.
Give it a good mix and set it aside. The slaw should be cold and crisp, ready to add that refreshing bite to each wrap. If you're making these ahead, keep the slaw separate until serving to maintain its crunch.
👨🍳 Step 3: Warm the Tortillas and Assemble the Wraps
Warm the 12 whole large flour tortillas in a dry skillet over medium heat for about 30 seconds per side or until they're pliable and slightly crispy at the edges. This step is crucial—warm tortillas hold up better to all the fillings and prevent soggy wraps. I like to keep them wrapped in a clean kitchen towel to stay warm while I assemble everything.
Spoon about ½ cup of the pulled pork mixture onto each tortilla. Then add ¼ cup of the slaw mix and ⅓ cup of the shredded sharp cheddar cheese. The cheese will melt beautifully from the residual heat of the pork and tortillas, creating that gooey, stretchy texture we all love.
🥘 Step 4: Fold and Serve with Confidence
Fold each tortilla into a burrito-style wrap by first folding in the sides, then rolling it up tightly from the bottom. The key here is to press gently but firmly as you roll to ensure everything stays contained. If you're serving immediately, you can keep them wrapped or cut them in half for easier handling.
For the ultimate presentation, arrange the wraps on a platter with any leftover BBQ sauce drizzled on top. Serve with extra slaw mix and cheese on the side so everyone can customize their wraps. These wraps are best served warm when the cheese is melty and the tortillas are still slightly soft—trust me, the first bite is worth the effort!
Pro Tips For Making Bbq Pulled Pork Wrap
- Trim That Fat: Cut the fat cap off the pork shoulder before cooking—it’s the only way to avoid greasy, soggy wraps later. I used to skip this, and my pulled pork always ended up drowning in its own renderings, turning the tortilla into a grease trap. ---
- Char the Onion First: Sear sliced yellow onion in the same pan you brown the pork shoulder until blackened in spots—this adds depth to the BBQ sauce and caramelizes the flavors before they even hit the meat. Sounds weird, but it works: the onion’s sweetness cuts through the smokiness of the pork. ---
- Don’t Rush the Pull: Wait until the pork shreds with zero resistance at 203°F (95°C)—any lower, and you’re left with chewy strings. I learned this the hard way after serving tough, overcooked shreds that made people question their life choices. ---
- Vinegar Boost: Toss the pulled pork with 2 tablespoons of apple cider vinegar right off the heat—it tenderizes the meat further and balances the sweetness of the BBQ sauce. Skip this, and your wraps taste one-note; add it, and the flavors pop.
Common mistakes when making great bbq pulled pork wrap
Overcooking the Pork
I've seen so many cooks walk away from their pulled pork too early, thinking it's done when it's still tough. The pork should reach an internal temperature of 203°F—anything less and you'll have chewy, unsatisfying bites. Use a meat thermometer to check the thickest part of the shoulder. I always let mine cook until it's falling apart on its own, which usually takes 4-5 hours total in the oven.
Once you hit that perfect temp, resist the urge to shred immediately. Let the pork rest for 15-20 minutes before shredding—this allows the juices to redistribute, keeping every bite moist. I've ruined more than a few batches by shredding too soon and losing all that precious moisture. 🔥
Skipping the Resting Phase
The resting phase isn't just for show—it's where the magic happens. When you pull the pork from the oven, those juices are still concentrated in the center. If you shred immediately, they'll run out as you handle the meat, leaving you with dry, stringy pork. I've learned this the hard way after serving dry pulled pork at my first competition.
Pro tip: Tent the Dutch oven loosely with foil and let it sit for those 15-20 minutes. The residual heat will keep everything warm while the juices redistribute. This simple step makes all the difference between good pulled pork and exceptional pulled pork. Trust me on this one.
Using Cold Tortillas
Cold tortillas are the number one reason wraps fall apart at the seams. When I first started making these, I'd just grab tortillas straight from the fridge and assemble them—big mistake. Cold tortillas can't hold up to the weight of all those fillings, leading to messy, unappetizing wraps.
Always warm your tortillas first—either in a dry skillet for 30 seconds per side or wrapped in a damp towel in the microwave for 20 seconds. The heat makes them pliable and helps them hold their shape. I keep a stack of warmed tortillas wrapped in a clean kitchen towel while I assemble everything to keep them warm and flexible. 🌯
Overloading the Wraps
I've seen people stuff these wraps so full they can barely close them, let alone pick them up. The key is balance—you want enough filling to satisfy, but not so much that it spills out when you take that first bite. A good rule of thumb is ½ cup pork, ¼ cup slaw, and ⅓ cup cheese per wrap.
If you're serving a crowd, consider cutting the wraps in half or making them slightly smaller. The goal is to create a handheld masterpiece, not a culinary disaster waiting to happen. I've learned to err on the side of caution—better to have slightly smaller, perfect wraps than giant, unmanageable messes. 💡
Ignoring the Sauce Consistency
The sauce is what ties everything together, and if it's too thin or too thick, your wraps will suffer. The ideal BBQ sauce for pulled pork should be thick enough to cling to the meat but still spreadable. If your sauce is too thin, simmer it uncovered for 10-15 minutes to reduce it.
On the flip side, if it's too thick, add a splash of apple cider vinegar or water to loosen it up. I've had to rescue more than one batch of sauce that was either too runny or too gloppy. The right consistency ensures every bite is flavorful and cohesive. Taste as you go—this is where your palate becomes your best tool. 🍯
Nutrition facts
Frequently asked questions
Can I make these wraps ahead of time?
Assemble the wraps and wrap them tightly in foil—they'll stay fresh in the fridge for up to 1 day. For longer storage, freeze the cooked pork mixture before assembling (up to 3 months). Reheat in a skillet or microwave until warm before serving. The tortillas will soften slightly when reheated, but they'll still hold up perfectly.
What's the best way to reheat leftovers?
For best results, reheat wrapped portions in a skillet over medium-low heat for 2-3 minutes per side, covered with a lid. This keeps the tortillas from drying out. If using the microwave, wrap them in a damp paper towel and heat for 30-45 seconds. The cheese will melt beautifully from the residual heat of the pork.
Can I use chicken or turkey instead of pork?
Yes, but you'll need to adjust cooking times. Chicken thighs work best (cook for 2-2.5 hours at 300°F), while turkey should reach 165°F internally. Use the same BBQ sauce and assembly method, but expect slightly different textures. The pork's fat content makes it more forgiving for slow cooking.
How do I make these gluten-free?
Swap the flour tortillas for gluten-free wraps (like Mission GF or La Tortilla Factory GF). Use tamari instead of soy sauce in your BBQ rub, and check that your coleslaw mix and BBQ sauce are certified gluten-free. The pork and cheese remain safe for gluten-free diets. Always verify labels, as cross-contamination is possible in shared facilities.
What's the secret to perfect cheese melt?
The key is residual heat! Warm the tortillas first, then assemble with hot pork (straight from the oven). The cheese will melt beautifully from the pork's heat without needing extra cooking. For extra gooeyness, sprinkle a little BBQ sauce on top before folding—it helps the cheese melt more evenly.