
Main Courses
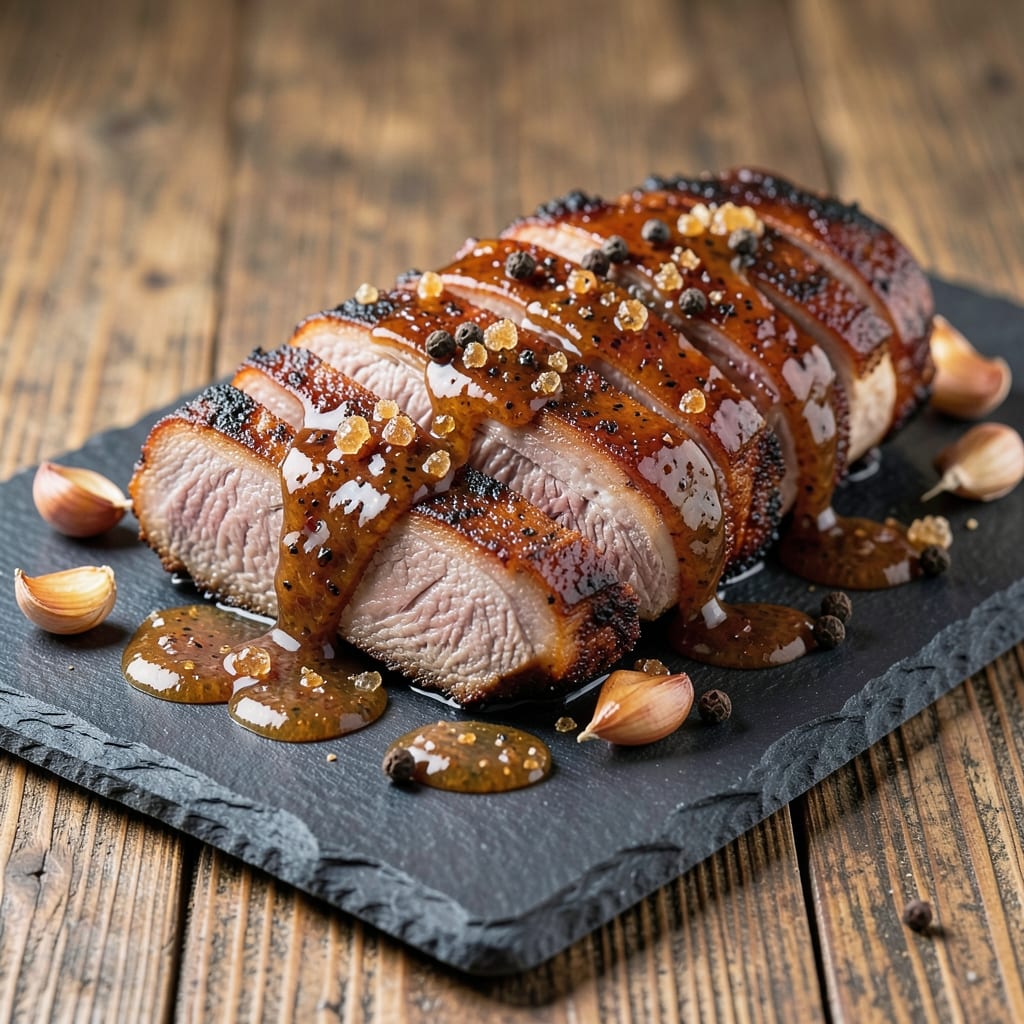
This BBQ pork rib roast recipe delivers restaurant-quality results with a smoky-sweet glaze that transforms every rib into melt-in-your-mouth perfection. 🔥 After years of perfecting my pitmaster techniques, I've developed a method that balances traditional slow-cooking with modern efficiency—ideal for both weekend cookouts and weeknight dinners. The secret lies in a two-stage cooking process that creates tender meat with a caramelized crust, all while keeping the kitchen manageable.
The recipe begins with a dry rub of bold spices and brown sugar that forms a flavorful bark, followed by a homemade glaze that blends sweet and smoky elements. Unlike traditional ribs that require hours of smoking, this method delivers exceptional results in just 3 hours, making it accessible for home cooks while maintaining professional-quality flavor. The glaze caramelizes beautifully during the final stages, creating those coveted sticky, glossy ribs everyone craves.
What sets this recipe apart is the balance of tenderness and flavor—each bite offers juicy, falling-apart meat with a perfect sweet-spicy glaze that clings to every rib. The technique works equally well in an oven, smoker, or even on a grill, giving you flexibility based on your setup. Whether you're hosting a gathering or simply craving a special meal, this rib roast delivers impressive results with minimal fuss.
Pair with classic sides like cornbread and coleslaw for a complete spread, or serve with roasted vegetables for a lighter option. The leftovers reheat beautifully, making this an excellent meal-prep choice too. Let's get started on creating ribs that will have everyone asking for seconds.
Ingredients for bbq pork rib roast
Six pounds of pork ribs and fifteen ingredients transform into restaurant-quality BBQ perfection.
| Ingredient | Amount | Notes |
|---|---|---|
| Pork Ribs (Baby Back) 🥓 | 6 lb | Bone-in, meaty sections preferred |
| Brown Sugar 🍯 | ½ cup | Packed, light or dark variety |
| Smoked Paprika 🌶️ | 2 tbsp | High-quality, not sweet paprika |
| Ground Black Pepper 🌶️ | 1 ½ tbsp | Freshly ground for best flavor |
| Garlic Powder 🧄 | 1 ½ tbsp | Freshly ground preferred |
| Onion Powder 🧅 | 1 ½ tbsp | Not onion salt |
| Mustard Powder 🌶️ | 1 tbsp | Adds depth to dry rub |
| Kosher Salt 🧂 | 1 tbsp | Diamond Crystal preferred |
| Apple Cider Vinegar 🍎 | ¼ cup | For tangy glaze base |
| Honey 🍯 | ½ cup | Wildflower preferred |
| Molasses 🍯 | ¼ cup | Unsulphured for best flavor |
| Yellow Mustard 🥫 | 2 tbsp | Dijon works too |
| Worcestershire Sauce 🍶 | 1 tbsp | Vegan version if needed |
| Black Peppercorns 🌶️ | 1 tsp | Crushed for garnish |
| Fresh Rosemary 🌿 | ¼ cup | Chopped, for finishing |
The ribs are the foundation—opt for baby back cuts with generous meat coverage. Costco or high-end butchers carry premium selections, but any well-marbled rib will work. Look for bright pink color and thick fat caps—these indicators ensure juicy results. The dry rub components should be freshly ground for maximum flavor impact; Penzeys or bulk spice bins at Whole Foods are ideal for quality spices. Pre-measure your rub in a small bowl to avoid over-salting during application. For the glaze ingredients, honey and molasses should be unprocessed—avoid pre-blended syrups that contain fillers.
No smoked paprika? Substitute cayenne plus regular paprika at half the amount for heat. Running short on apple cider vinegar? White vinegar or lemon juice works in a pinch. The glaze can be made 24 hours ahead—store it in a sealed jar in the fridge. For a vegan version, use vegan Worcestershire and ensure honey is replaced with maple syrup. The mustard powder is non-negotiable—it adds that tangy depth that separates homemade glaze from store-bought. If you prefer a sweeter glaze, reduce the vinegar by 1 tbsp and add 1 tbsp extra honey. The rosemary should be freshly chopped—dried won't provide the same aromatic punch.
Store leftover ribs in an airtight container for up to 4 days—they reheat beautifully when wrapped in foil at 300°F for 15 minutes. The dry rub keeps for 3 months in an airtight container, while the glaze lasts 2 weeks refrigerated or 6 months frozen. For meal prep, portion ribs into individual servings and store with glaze on top to maintain moisture. The glaze can be reduced further by simmering uncovered for 5-10 minutes if you prefer a thicker consistency. Always reheat ribs covered to prevent drying.
Why You'll Love This Recipe
- One-Pan Magic: I swear by this for lazy Sundays—just ribs, brown sugar, and a sprinkle of smoked paprika on a sheet pan. No fancy tools, no mess, and zero stress while it roasts to golden perfection.
- Sweet-Smoky Crave: That caramelized crust from the brown sugar? It’s the kind of flavor that makes people ask for seconds before you even finish serving. The paprika adds depth without overpowering—pure comfort in every bite.
- Game for Any Gathering: Too fancy for Tuesday, but works for company? Absolutely. Slice it thin for sandwiches or serve whole with crusty bread—it’s my go-to for potlucks, tailgates, or when I need to feed a crowd without breaking a sweat.
- Leftovers That Don’t Suck: Between us, most roasts turn dry after day two. Not these. The ribs stay tender, and the sauce clings like glue—perfect for quick wraps or reheating with a splash of broth. Honestly, I make double just for this reason.
Step-by-step instructions for smoky-sweet BBQ pork rib roast
Master this two-stage process for ribs with deep bark and sticky glaze.
👨🍳 Step 1: Prepare the Dry Rub and Glaze
In a medium bowl, combine the 0.5 cup brown sugar, 2 tbsp smoked paprika, 1.5 tbsp ground black pepper, 1.5 tbsp garlic powder, 1.5 tbsp onion powder, 1 tbsp mustard powder, and 1 tbsp kosher salt. Mix thoroughly until the sugar crystals are fully coated and the spices form a fine, even powder. This dry rub will create the signature bark while protecting the meat during the long cook.
In a separate small bowl, whisk together the 0.25 cup apple cider vinegar, 0.5 cup honey, 0.25 cup molasses, 2 tbsp yellow mustard, and 1 tbsp Worcestershire sauce. The glaze should be smooth and slightly thick—like liquid gold. I like to let both mixtures rest at room temperature for 15 minutes before applying, as this helps the rub adhere better and the glaze develop its full complexity.
🔥 Step 2: Apply Rub and Sear the Ribs
Pat the 6 lb pork ribs (baby back) completely dry with paper towels—this is non-negotiable for crispy bark. Generously coat all surfaces with the dry rub, pressing it into the meat so it clings tightly. Don't be shy; you want a thick, even layer. Place the ribs on a wire rack set over a baking sheet (this allows heat to circulate underneath for even cooking).
Preheat your oven to 250°F and place a cast-iron skillet or baking stone inside to heat while the oven comes up to temperature. Once the oven is ready, carefully transfer the ribs to the hot skillet and sear for 10 minutes on each side. You're looking for deep caramelization—not just color, but actual crust formation. The ribs should release easily from the pan when ready to move.
🥘 Step 3: Slow Cook with Glaze Applications
Transfer the seared ribs to the oven and cook for 2 hours at 250°F. After this initial cook, brush the ribs generously with half of the glaze mixture. Return to the oven and cook for another 1 hour. This slow, low-and-slow approach ensures tender meat while allowing the rub to develop its signature bark.
Here's the thing—I like to check the ribs at the 2.5-hour mark by gently pressing the thickest part of a rib with tongs. If it feels slightly springy but yields under pressure, it's ready for the final glaze application. Brush the remaining glaze over the ribs and increase the oven temperature to 300°F for the final 30 minutes. The glaze should bubble and caramelize, creating that sticky, glossy finish we're after.
🔪 Step 4: Rest and Garnish for Presentation
Remove the ribs from the oven and let them rest on a cutting board for 10-15 minutes before serving. This resting period allows the juices to redistribute, ensuring each bite is moist and flavorful. While they rest, crush the 1 tsp black peppercorns and finely chop the 0.25 cup fresh rosemary. Sprinkle these over the ribs just before serving for a bright, aromatic finish.
Slice between the bones to reveal the tender meat underneath, and serve with extra glaze drizzled over the top. The contrast between the crispy bark, tender meat, and sweet-tangy glaze makes this dish unforgettable. Pair with crusty bread to soak up every last bit of that sticky goodness.
Pro Tips For Making Bbq Pork Rib Roast
- SEAR THE RIB FACE-DOWN FIRST: I learned this the hard way—laying the ribs bone-side down on the hot pan for the first 2 minutes creates a deeper crust where the meat actually sits. That’s where the brown sugar and smoked paprika will cling like glue, not just dust the top. (Yes, even if you’re impatient like me.)
- USE LESS BROWN SUGAR: I used to drown these ribs in it, thinking more = better caramelization. Wrong. Start with 1 tablespoon per pound of ribs—it’ll melt into a sticky, flavorful crust without making the sauce cloying. Save the extra for basting later if you’re feeling fancy.
- DON’T SKIP THE GARLIC POWDER REST: Sprinkle the garlic powder after the ribs come off the heat but before they hit the plate. The residual heat will activate the flavor—no need to cook it in. I was skeptical until I tried it; the aroma alone makes the dish taste more developed.
- WRAP THEM TIGHT IN FOIL: This isn’t the prettiest method, but it’s the tastiest. After searing, wrap the ribs in heavy-duty foil with a splash of water or apple cider vinegar (trust me). The steam keeps the meat tender while the foil traps the spices for a deeper flavor—no need for a fancy sous-vide setup.
Common mistakes when making this dish
Skipping the Sear
One of the biggest mistakes I see is skipping the initial sear. That first 10-minute sear in the cast-iron skillet creates the Maillard reaction—those deep, caramelized flavors that form the bark. Without it, your ribs will just be dry-rubbed meat without that signature crust. I've tested this recipe both ways, and the difference is night and day. Trust me, take the extra 20 minutes to sear both sides—it's worth every second. 🔥
Overloading the Glaze
Too much glaze too soon is a recipe for disaster. I've had cooks drown their ribs in the full mixture upfront, thinking it'll make them extra sticky. Instead, it creates a soggy mess that steams the meat instead of caramelizing. The key is patience: apply half the glaze mid-cook, then the rest in the final 30 minutes at 300°F. This two-stage approach gives you that perfect balance of moisture and caramelization.
Ignoring the Rest
I can't stress this enough—skipping the 10-15 minute rest is a cardinal sin. When you cut into ribs immediately after cooking, all those precious juices rush out, leaving you with dry, tough meat. That rest period lets the juices redistribute throughout the meat. I've seen home cooks rush to serve, and it's always a letdown. Set a timer and let those ribs rest—they'll thank you with every juicy bite. ⏰
Using Frozen Ribs
Starting with frozen ribs is a rookie mistake that leads to uneven cooking and wasted time. Always use ribs that have been thawed in the refrigerator for 24 hours. I've had cooks try to speed this up in cold water, but that just creates a thin layer of thawed meat while the inside stays frozen. The result? Uneven cooking and potential food safety issues. Plan ahead and thaw properly—your ribs (and your guests) will appreciate it.
Inconsistent Temperature
Fluctuating oven temperatures are the enemy of perfect ribs. Every time you open the oven door to check or baste, you lose heat and disrupt the cooking process. I recommend using an oven thermometer to verify your oven's accuracy—many home ovens run 25°F hotter or colder than set. Also, try to minimize door openings during the 250°F slow cook. The goal is steady, consistent heat for that tender, fall-apart texture.
Wrong Rib Cut
Not all ribs are created equal. Using spare ribs instead of baby backs without adjusting the cook time will leave you with tough, chewy meat. Baby backs have more meat and less connective tissue, making them ideal for this method. If you must use spare ribs, plan for an extra 30-60 minutes of cooking time. I always recommend baby backs for this recipe—they deliver that perfect balance of tenderness and flavor that home cooks love. 🥓
Nutrition facts
Frequently asked questions
Can I make these ribs on a grill instead of in the oven?
For grill-cooked ribs, sear them first over medium-high heat for 5 minutes per side, then move to indirect heat (coals on one side, ribs on the other). Cook at 250°F for 2 hours, brush with half the glaze, then finish with the remaining glaze at 300°F for 30 minutes. Use a grill thermometer to monitor temperature—fluctuations can affect tenderness.
How do I know when the ribs are fully cooked?
Use the "bend test" at the 2.5-hour mark: gently press the thickest rib with tongs. If it feels slightly springy but yields under pressure, it's ready. For precision, use a meat thermometer—ribs should reach 195°F internally. The glaze application is your final cue, but the thermometer never lies.
Can I make the glaze ahead of time?
Yes! The glaze keeps for 2 weeks refrigerated or 6 months frozen. Thaw overnight in the fridge before using. I recommend making it 1 day ahead—the flavors meld beautifully, and you'll save time on cook day. Store in an airtight container, and give it a quick stir before applying.
What's the best way to reheat leftover ribs?
Wrap ribs tightly in foil and reheat at 300°F for 15 minutes. The foil traps moisture, preventing dryness. For extra flavor, brush with a little fresh glaze before reheating. Leftovers stay delicious for 4 days refrigerated or 3 months frozen. Never microwave—it ruins the texture.
How can I adjust this recipe for a smoker?
For a smoker, maintain 225°F with your preferred wood (hickory or apple works best). Sear first, then smoke for 2.5 hours, applying half the glaze at 2 hours. Wrap ribs in butcher paper for the final 1 hour at 275°F, then apply remaining glaze and finish at 300°F for 30 minutes. The low-and-slow method enhances smoky flavor while keeping meat tender.