
Main Courses
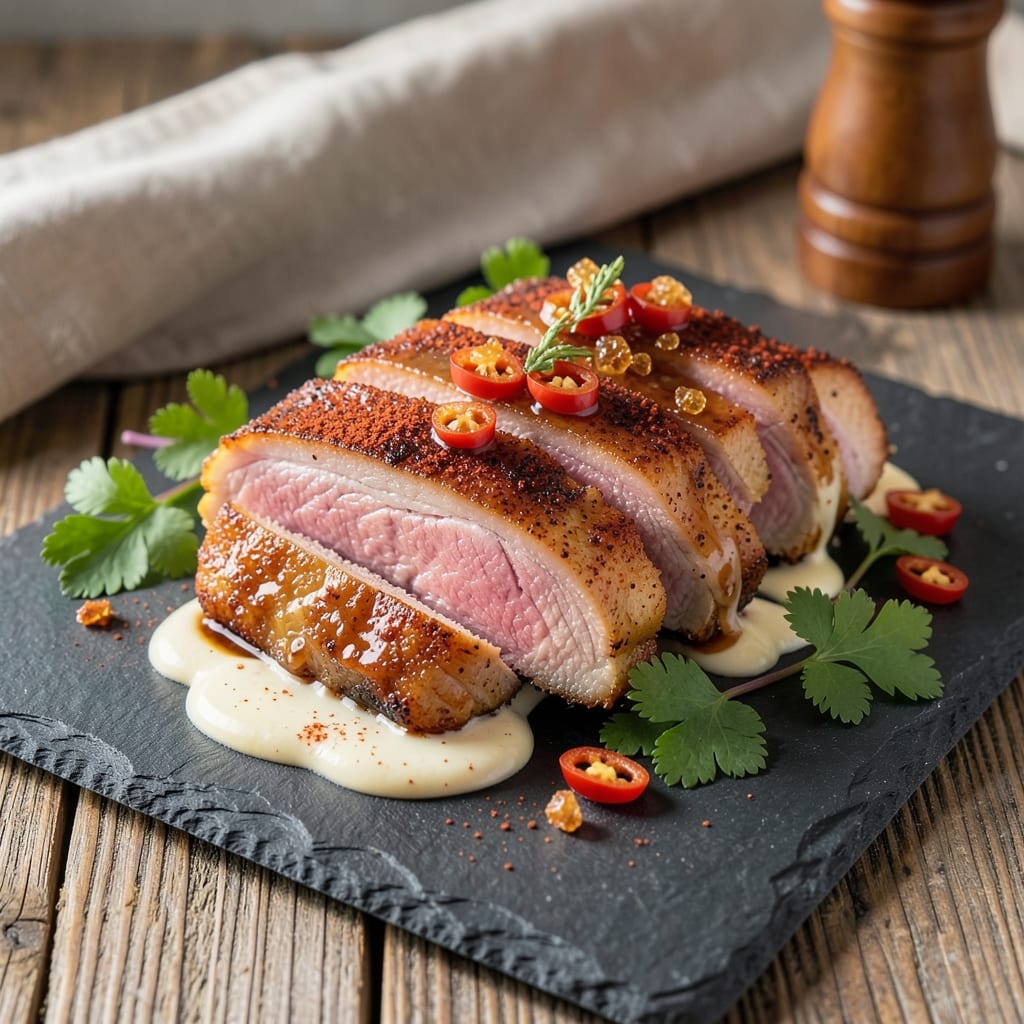
Crispy BBQ pork belly slices deliver that perfect balance of smoky bark and melt-in-your-mouth fat—every bite is pure indulgence. 🔥 I've spent years perfecting this technique, blending classic pitmaster methods with French precision to create slices that rival my favorite competition entries. The secret lies in the slow render of the fat, paired with a dry rub that develops deep, caramelized crusts while keeping the interior tender enough to cut with a fork.
What sets this recipe apart is the two-stage cooking process: first rendering the fat low and slow, then finishing with high heat to create that coveted crispy bark. I use a simple but potent dry rub of brown sugar, smoked paprika, and cayenne—just enough heat to complement the natural richness of the pork belly without overpowering it. This method ensures you get that perfect contrast of textures and flavors in every slice.
The result is pork belly slices that are irresistibly crispy on the outside, with fat that's just rendered enough to be silky and flavorful. The bark is rich and caramelized, while the interior remains tender and juicy—no tough, chewy edges here. These slices are perfect for serving at gatherings, family dinners, or even as a showstopping appetizer when sliced thin and arranged on a platter.
Pair them with classic BBQ sides like tangy pickled onions, creamy coleslaw, or a fresh garden salad to round out the meal. The key is letting the pork belly rest after cooking—this allows the juices to redistribute, ensuring every bite is as flavorful as the first. Let's get cooking!
Ingredients for bbq pork belly slices
These ingredients transform ordinary pork belly into restaurant-quality BBQ slices with crispy bark and melt-in-your-mouth fat.
| Ingredient | Amount | Notes |
|---|---|---|
| Pork Belly 🐖 | 3 lb | Skin-on, cut into 1-inch slices |
| Brown Sugar 🍚 | ¼ cup | Light or dark preferred |
| Smoked Paprika 🌶️ | 2 tbsp | For deep smoky flavor |
| Cayenne Pepper 🔥 | 1 tsp | Adjust for heat preference |
| Kosher Salt 🧂 | 1 ½ tbsp | Diamond Crystal preferred |
| Black Pepper 🌶️ | 1 tsp | Freshly ground for best flavor |
| Garlic Powder 🧄 | 1 tsp | Not garlic salt |
| Onion Powder 🧅 | 1 tsp | For subtle depth |
| Apple Cider Vinegar 🍎 | 2 tbsp | For tangy balance |
| Olive Oil 🫒 | 2 tbsp | For basting |
| Honey 🍯 | 1 tbsp | For glaze finish |
| Fresh Rosemary 🌿 | 1 sprig | For aromatic touch |
| Fresh Thyme 🌿 | 1 sprig | For herbal brightness |
The pork belly is the star—look for thick cuts with a good layer of fat. Costco or Whole Foods usually have the best quality, but any butcher shop will do. Skip the pre-sliced stuff; you want to slice it yourself for even cooking. The skin should be intact and the fat should look firm but not frozen. If you're nervous about slicing, ask the butcher to do it for you—just make sure they cut it into 1-inch slices. The dry rub ingredients are all pantry staples, but smoked paprika from Penzeys makes a world of difference compared to the generic grocery store kind.
No smoked paprika? Substitute half the amount with regular paprika plus a pinch of liquid smoke. Running low on fresh rosemary? Dried works at one-third the amount, but fresh is worth hunting down for that aromatic punch. The apple cider vinegar adds tang—substitute lemon juice if that's what you've got. For extra crispiness, brush with a mix of olive oil and honey before the final sear. The key is patience: let the fat render slowly so you don't end up with greasy slices. And trust me, don't skip the resting time—this is where the magic happens as the juices redistribute.
Pork belly keeps beautifully—store it in the fridge for up to 4 days before cooking. Once sliced, the leftovers reheat wonderfully in a 350°F oven for 10 minutes, wrapped in foil. For longer storage, freeze the cooked slices for up to 3 months. I always make extra because they disappear fast. These slices are perfect for meal prep—just reheat and serve. The fat gets even more flavorful over time, so leftovers often taste better than the first batch!
Why You'll Love This Recipe
- One-Pan Magic: I swear by this—just toss the pork belly slices on a sheet pan, sprinkle that smoky-sweet mix of brown sugar and paprika, and let the oven do the work. No fancy equipment, no stress.
- Sweet & Smoky Bomb: That caramelized crust from the brown sugar? Chef’s kiss. The smoked paprika and cayenne add just enough heat to make every bite unforgettable—crispy outside, tender inside.
- Party in a Box: Serve it at game day with zero fuss, or pack slices for lunch the next day. My kids grab them straight from the fridge—no reheating needed.
- Budget-Friendly Luxury: Pork belly feels fancy, but this recipe stretches it far. A single slab feeds four, and leftovers reheat beautifully. Best of all? The ingredients cost less than takeout.
Step-by-step instructions for crispy pork belly slices
Here's how to transform fatty pork belly into irresistible slices with crackling bark and melt-in-your-mouth tenderness.
🔥 Step 1: Prep the Pork Belly for Maximum Crisp
Start by cutting the 3 lb Pork Belly into 1-inch thick slices—this thickness ensures even cooking and that perfect balance of crispy exterior and juicy interior. Pat each slice dry with paper towels, pressing firmly to remove all moisture. Wet pork belly won't crisp properly, so take your time here. I like to work in batches, keeping the dried slices on a wire rack while I prep the next ones.
In a small bowl, mix together the 0.25 cup Brown Sugar, 2 tbsp Smoked Paprika, 1 tsp Cayenne Pepper, 1.5 tbsp Kosher Salt, 1 tsp Black Pepper, 1 tsp Garlic Powder, and 1 tsp Onion Powder. This dry rub is your flavor foundation—don't skimp on the salt, as it helps draw out moisture for that coveted crispiness. Rub this mixture generously over both sides of each pork belly slice, pressing it into the meat so it adheres well. Let the slices sit at room temperature for 30 minutes while you prepare the next steps.
🍳 Step 2: Build the Glazing Sauce
In a small saucepan, combine the 2 tbsp Apple Cider Vinegar, 2 tbsp Olive Oil, and 1 tbsp Honey. Place over medium heat and bring to a gentle simmer. Let it cook for 3-4 minutes until slightly thickened—you're looking for a glossy, syrupy consistency that will caramelize beautifully on the pork. The vinegar adds tang that cuts through the richness, while the honey creates that perfect sticky glaze.
Remove the sauce from heat and stir in the 1 sprig Fresh Rosemary and 1 sprig Fresh Thyme, letting them steep for 5 minutes. This infuses the sauce with aromatic depth. Strain out the herbs before using the sauce, unless you want a more rustic texture with visible herb bits. Keep the sauce warm in a small saucepan while you cook the pork—this ensures it's ready to baste at the perfect moment.
🔥 Step 3: Cook Until Golden and Crisp
Heat your oven to 425°F and line a baking sheet with aluminum foil, leaving some overhang for easy transfer. Arrange the seasoned pork belly slices on the prepared sheet, skin-side up. This orientation is crucial—it allows the fat to render down and baste the meat as it cooks. Place the baking sheet on the middle rack of your oven and bake for 45 minutes, rotating the pan halfway through for even browning.
After 45 minutes, carefully flip each slice using tongs and brush the skin-side generously with the warm glaze. Return to the oven and bake for another 15-20 minutes until the skin is deep golden brown and crackling. You'll know it's ready when the skin sounds like rice crispies when you tap it lightly. The internal temperature should reach 195-200°F—this is the perfect range for tender, pull-apart pork belly.
⏰ Step 4: Rest and Slice for Perfect Texture
Remove the pork belly from the oven and let it rest for 10 minutes before slicing. This resting period is non-negotiable—it allows the juices to redistribute throughout the meat, preventing them from pooling on your cutting board. Tent loosely with foil to keep warm. Here's the thing—if you slice too soon, you'll lose all that precious fat and end up with dry slices. Patience pays off here.
Once rested, slice the pork belly against the grain into ¼-inch thick slices. The grain runs lengthwise, so you'll see lines in the meat—cut perpendicular to these lines for maximum tenderness. Arrange the slices on a serving platter, skin-side up, and drizzle any remaining glaze over the top. Serve immediately with your favorite sides—crispy pork belly is best enjoyed fresh from the oven when the skin is at its crackliest.
Pro Tips For Making Bbq Pork Belly Slices
- CRANK THE HEAT FIRST: Pork belly needs that initial sear to render fat fast and lock in flavor. Start over medium-high heat—yes, even if your pan isn’t screaming—and let it sizzle for 3-4 minutes per side before dropping to medium. I used to play it safe with medium heat, and the slices always ended up greasy instead of crispy.
- SALT THE BELLY 24 HOURS EARLY: Skip the rush—generously coat the pork belly in kosher salt (about 1.5 teaspoons per pound) and refrigerate uncovered for a full day. This isn’t just about seasoning; it’s about curing the surface so the slices stay tender and the crust stays intact. I learned this the hard way after my first batch turned out chewy.
- DON’T SKIP THE REST: After cooking, tent the pork belly with foil and let it rest for at least 10 minutes—no peeking, no cutting. The fat needs time to redistribute, or your slices will ooze grease instead of staying juicy. I know, I know, but trust the process—your first bite will prove it.
- TOSS IN THE SUGAR LATE: Brown sugar burns faster than you think, so sprinkle it on only in the last 2-3 minutes of cooking. This caramelizes just enough to add depth without turning bitter. I was skeptical until I tried it—now I double-check the timer so I don’t overdo it.
Troubleshooting this dish
Fat Not Rendering
If your pork belly isn't developing crispy bark or the fat isn't rendering properly, your oven temperature might be too low. I've seen this happen when ovens run 25°F below the set temperature—always calibrate your oven with an oven thermometer before cooking. Another common issue is overcrowding the pan, which traps steam and prevents proper browning. Arrange slices with ½-inch gaps between them for optimal airflow. 🌡️
Dry or Tough Meat
Overcooking is the usual culprit here. Pork belly should have a fork-tender interior at 195-200°F internal temperature—any higher and it becomes dry. Use a meat thermometer to monitor progress. If you're cooking on the stovetop instead of in the oven, reduce heat to medium-low once the skin starts browning to prevent overcooking. I've also found that thicker slices (1.5 inches) stay juicier than thinner ones.
Uneven Cooking
Uneven browning often results from poor heat distribution. Rotate your baking sheet halfway through cooking to ensure even exposure to heat. For stovetop cooking, use a heavy-bottomed skillet like a Lodge cast iron to distribute heat evenly. If you notice one side cooking faster, flip the slices more frequently. I've had success with a broiler finish for the last 2-3 minutes to get that perfect caramelized crust on stubborn spots.
Rub Not Sticking
The dry rub should adhere well to the pork belly, but sometimes it falls off during cooking. The fix is simple: pat the pork belly slices extra dry before applying the rub, and press it on firmly with your fingers. For extra grip, lightly mist the slices with olive oil spray before adding the dry rub. I've also had luck using a light cornstarch coating (just a pinch) as a binder for the rub.
Skin Not Crackling
Achieving that coveted crackling skin requires precise timing and technique. The skin should be completely dry before cooking—any moisture will prevent crispiness. For extra crispiness, I recommend a double-sear method: first sear skin-side down in a cold skillet over medium heat for 8-10 minutes, then transfer to a 425°F oven to finish. The cold skillet helps render the fat gradually without burning the skin.
Nutrition facts
Frequently asked questions
Can I use pork belly with the skin removed?
The skin is what creates that amazing crispy bark, so I recommend keeping it on for best results. If you absolutely must remove it, you'll need to cook the slices at a slightly lower temperature (400°F) for 5-10 minutes longer to compensate. The texture will be more tender without the crispy skin, but still delicious!
How do I store leftovers to keep them crispy?
Store cooked slices in an airtight container in the fridge for up to 4 days. To reheat, wrap them in foil and bake at 300°F for 10-15 minutes—this keeps them moist without making the skin soggy. For extra crispiness, reheat uncovered for the last 2 minutes.
Can I make these on the grill instead of the oven?
Preheat your grill to medium-high (400°F) and cook the slices skin-side down for 10-12 minutes until the fat renders. Flip carefully and cook another 8-10 minutes until the skin is crispy. The key is maintaining consistent heat—avoid flare-ups by trimming excess fat if needed.
What's the best way to serve these slices?
Arrange the slices on a platter with the crispy skin facing up. Pair with pickled vegetables, creamy coleslaw, or a fresh herb salad to balance the richness. For a showstopper, drizzle with extra glaze and garnish with fresh thyme sprigs.
Why does my pork belly turn out greasy instead of crispy?
Greasy slices usually mean the fat rendered too quickly. Try cooking at 375°F for 10 minutes longer to render fat gradually, then increase heat to 425°F for the final crisp. Also ensure your pork belly slices are completely dry before cooking—any moisture prevents proper browning.