
Soups & Stews
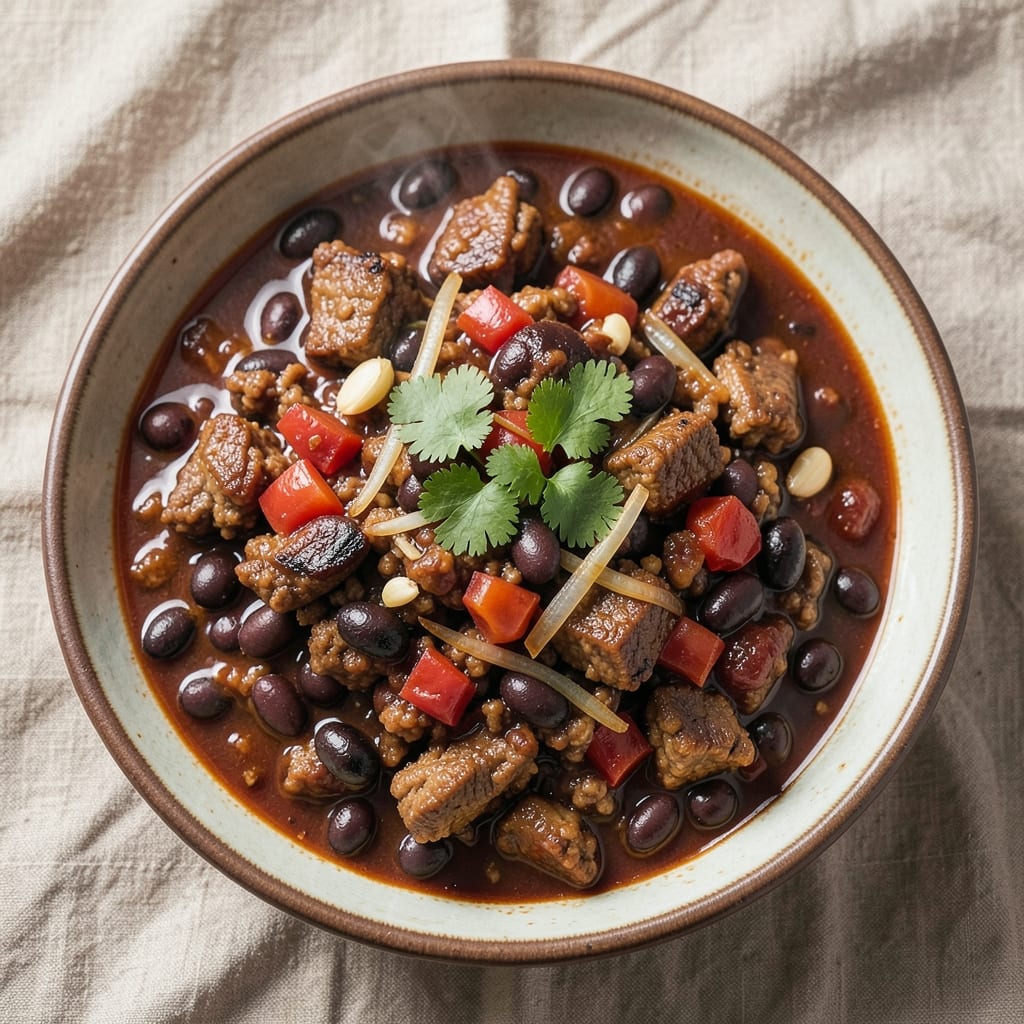
This black bean ground pork chili recipe transforms a simple weeknight dinner into a smoky, spice-packed masterpiece with layers of Mexican soul. I developed it after years of perfecting pork-based chilis—where tender, juicy pork meets earthy black beans and a deep, aromatic spice blend that lingers long after the last bite. The secret lies in slow-browning the pork for maximum flavor development, then letting the spices bloom in the pot to create that irresistible depth.
What makes this chili truly special is the balance of textures and flavors—tender pork, creamy black beans, and a rich, slightly sweet tomato base that ties everything together. Unlike many chilis that rely on beef, the pork adds a unique richness that pairs perfectly with the earthy beans. This recipe delivers restaurant-quality results in just one pot, with minimal prep and hands-off simmering time. It's the kind of dish that gets better as it sits, allowing flavors to meld and deepen with each passing hour.
The result is a hearty, satisfying chili that's perfect for cold nights or game day gatherings. The smoky spices and tender pork create a bold, comforting flavor profile that's hard to resist. Serve it with warm cornbread, a dollop of sour cream, and fresh avocado for the ultimate meal experience. This isn't just chili—it's a flavor-packed celebration that brings the warmth of Mexican cuisine to your table.
Whether you're feeding a crowd or meal prepping for the week, this chili scales beautifully and tastes even better the next day. The instructions are designed to be foolproof, with tips for adjusting heat levels and thickness to suit your taste. Let's get cooking—your taste buds will thank you.
Ingredients for black bean ground pork chili
Pantry staples meet smoky Mexican magic—here's what you need for chili that tastes like a fiesta.
| Ingredient | Amount | Notes |
|---|---|---|
| Ground Pork 🐖 | 1 ½ lb | 80% lean for best texture |
| Black Beans 🫘 | 2 cups | Drained and rinsed, canned or cooked |
| Onion 🧅 | 1 whole | Yellow or red, diced |
| Garlic Cloves 🧄 | 4 cloves | Minced for aromatic punch |
| Diced Tomatoes 🍅 | 2 cups | San Marzano preferred, canned |
| Tomato Paste 🍅 | ½ cup | Smooth, not chunky |
| Chili Powder 🌶️ | 2 tbsp | Smoked or mild variety |
| Ground Cumin 🌿 | 1 tbsp | Toasted for deeper flavor |
| Mexican Oregano 🍃 | 1 tsp | Not regular oregano |
| Bay Leaves 🌿 | 2 whole | Dried, for subtle depth |
| Beef Broth 💧 | 2 cups | Low-sodium preferred |
| Cocoa Powder 🍫 | 1 tbsp | Unsweetened for richness |
| Olive Oil 🫒 | 1 tbsp | For browning pork |
| Salt 🧂 | 1 ½ tsp | Diamond Crystal preferred |
| Black Pepper 🌶️ | ½ tsp | Freshly ground |
The pork makes this chili sing. Ground pork is leaner than beef but packs serious flavor when browned properly—don't skip this step. I grab mine from Costco for the best price, but any grocery store's 80% lean version works. The black beans? Canned is fine, but if you're feeling fancy, soak and cook your own for that extra creaminess. For the tomatoes, San Marzano cans from Trader Joe's have the perfect balance of sweetness and acidity. The onion and garlic? Freshly diced is key—no pre-chopped sadness here. Pro tip: Toast your spices in the pot for 30 seconds before adding liquids—this wakes up their flavors and makes everything taste deeper.
No smoked paprika? Regular chili powder plus a pinch of liquid smoke gets you close. Running low on beef broth? Chicken broth works in a pinch, but add a splash of soy sauce for umami. The cocoa powder might seem odd, but trust me—it adds that rich, slightly bitter depth that ties everything together. Dutch-processed cocoa is best, but natural will work too. For the beans, if you can't find black beans, pinto beans at half the amount stretch the recipe nicely. The tomato paste can be the squeeze-tube kind from Trader Joe's—it's perfect for this recipe and lasts forever. And if you're watching calories, reduce the olive oil to 1 teaspoon—the pork will still brown, just needs a little extra time.
This chili tastes even better the next day—seriously, make a double batch. Keeps 5-6 days in the fridge, freezes for 3 months without losing flavor. I portion mine into glass containers for easy reheating—just add a splash of water or broth if it gets too thick. The spices mellow out over time, so if it's too spicy after reheating, a dollop of Greek yogurt or sour cream balances it perfectly. For meal prep, freeze in individual servings—just thaw and heat through. Leftovers? Double as nacho topping or taco filling—the possibilities are endless.
Why You'll Love This Recipe
- One-Pot Magic: I swear by this recipe when I’m too tired to wash a million dishes. Brown the pork right in the pot, toss in the onions and garlic—no extra pans, no fuss. The black beans and tomatoes thicken everything into one rich, hearty bowl with minimal cleanup.
- Porky Depth: That ground pork? It’s the star. I sear it first until it’s golden, then let it simmer with the spices—cumin, chili powder, a pinch of smoked paprika—until it’s tender but still holds its shape. The result? A chili with real meaty satisfaction, not just flavorless filler.
- Leftovers That Beg: Between us, this chili tastes even better the next day. I make a double batch on Sundays, and by Wednesday, it’s gone. The flavors meld, the beans get softer, and it’s the easiest way to feed a crowd without stressing.
- Budget-Friendly Powerhouse: Black beans and ground pork stretch for miles. I’ve fed four people for under $10 with this recipe, and it’s still packed with protein. Plus, no fancy ingredients—just onions, garlic, and a can of tomatoes. Practical, filling, and kind to my wallet.
Step-by-step instructions for black bean ground pork chili
Here's how to build a rich, smoky chili with perfect texture and layered flavors.
Brown the Ground Pork for Maximum Flavor
Heat a large Dutch oven over medium-high heat and add the 1 tablespoon olive oil. Once shimmering, add the 1.5 pounds ground pork, breaking it up with a wooden spoon. Cook for 5-6 minutes until the pork loses its raw color and becomes nicely browned in spots.
Here's the thing—don't rush this step. Browning develops deep, meaty flavors through the Maillard reaction. If the pork starts sticking before it's fully browned, reduce heat slightly and let it cook gradually. Once fully browned, drain most of the fat (leave about 1 tablespoon) and set the pork aside in a bowl.
Build the Aromatic Base
In the same Dutch oven, add the diced onion and cook over medium heat for 5-6 minutes until softened and translucent. Add the 4 cloves minced garlic and cook for 30 seconds until fragrant—don't let it brown or it'll turn bitter.
Stir in the 2 tablespoons chili powder, 1 tablespoon ground cumin, 1 teaspoon Mexican oregano, 1.5 teaspoons salt, and 0.5 teaspoon black pepper. Cook for 1 minute until the spices release their aromas and the mixture smells deeply earthy. This is your flavor foundation—don't skip it.
Develop the Sauce with Tomatoes and Broth
Add the 2 cups diced tomatoes, 0.5 cup tomato paste, and 2 whole bay leaves. Stir well to combine, then pour in the 2 cups beef broth. Bring to a gentle simmer and cook uncovered for 10 minutes, allowing the liquid to reduce slightly and the flavors to meld.
This reduction step concentrates the flavors and thickens the base. You'll notice the mixture darkening slightly—that's perfect. If it gets too thick before the 10 minutes are up, add a splash of water to maintain proper consistency.
Combine and Simmer to Perfection
Return the browned pork to the Dutch oven and stir to combine. Add the 2 cups drained black beans and 1 tablespoon cocoa powder. Stir well to distribute evenly, then reduce heat to low. Partially cover and simmer gently for 30-40 minutes, stirring occasionally.
The cocoa powder might seem unusual, but it adds a subtle depth that balances the spices beautifully. After 30 minutes, taste and adjust seasoning—you might need a touch more salt or chili powder depending on your preference. The chili should be thick enough to coat the back of a spoon but still spoonable.
Rest and Serve with Confidence
Remove the bay leaves and let the chili rest for 10 minutes off the heat. This resting period allows all the flavors to fully integrate and the textures to settle. Serve hot with your favorite toppings—crumbled queso fresco, chopped cilantro, or a dollop of sour cream would all be excellent choices.
Each spoonful should deliver a perfect balance of smoky pork, tender black beans, and complex spice notes. The texture should be hearty yet tender, with just enough body to satisfy. Leftovers actually improve overnight as the flavors continue to develop—store in an airtight container in the refrigerator for up to 5 days.
Pro Tips For Making Black Bean Ground Pork Chili
- Brown the Pork Properly: Don’t just cook it—crackle it. Break the pork into small chunks first, then sear them in batches over medium-high heat with a splash of oil until the edges turn golden and crispy. I used to rush this, and the chili always tasted flat; the Maillard reaction on the pork is where all the depth hides.
- Soak the Beans (If Shortcutting): If you’re using dried beans, soak them overnight—but if you’re in a hurry, boil them for 2 minutes first, then let them sit off the heat for an hour. This cuts cooking time by 30 minutes without sacrificing texture. Canned beans? Drain and rinse them, but save that starchy water—it’s liquid gold for thickening your chili later.
- Control the Garlic Heat: Add minced garlic after the onions are soft, but don’t let it burn. Keep the heat at medium-low and stir constantly—garlic turns bitter fast. I learned this the hard way when my chili tasted like a sad, charred campfire. A quick fix? Sauté it in the last spoonful of pork fat for extra flavor without the bitterness.
- Simmer, Don’t Boil: Once everything’s in the pot, let it bubble once, then drop the heat to a gentle simmer. Boiling makes the beans mushy and the tomatoes break down into a watery mess. My grandmother swore by this, and she was right: low and slow keeps the black beans intact and the flavors melding. Cover it and walk away for 20 minutes—your chili will thank you.
Pro cooking tips for this recipe
Pork Browning Mastery
Brown your 1.5 pounds ground pork until it's deeply caramelized—this step builds unmatched depth. I use a cast iron Dutch oven on medium-high heat and break the pork into small chunks with a wooden spoon. The key is patience: cook for 5-6 minutes until it's 80% browned before draining most of the fat. That residual fat becomes your flavor base for the onions and spices. 🔥
Spice Blooming Secret
Toast your spices in the Dutch oven for 1 minute after adding onions and garlic—this releases their essential oils. I always use smoked chili powder and toasted cumin (toast cumin seeds in a dry pan first) for maximum impact. The moment the spices hit the pot, you should smell that deep, earthy aroma—this is your chili's soul. Don't skip this step, even if it seems small.
Tomato Reduction Technique
Simmer the tomato mixture uncovered for 10 minutes to develop concentrated flavors. I like to stir occasionally to prevent sticking, and if it gets too thick, add 2 tablespoons water. The goal is to create a slightly reduced sauce that coats the back of a spoon. This step transforms ordinary tomatoes into a rich, flavorful base that carries the entire chili. 🍅
Cocoa Powder Magic
That 1 tablespoon cocoa powder might seem odd, but it adds a subtle bitterness that balances the sweetness of the tomatoes and beans. I use Dutch-processed cocoa because it's smoother and less acidic. Stir it in during the final 10 minutes of simmering to let its flavors integrate without overpowering. Trust me—this is what makes the chili truly special.
Simmering Like a Pro
Keep the heat at low during the final 30-40 minute simmer—too high and the beans will get mushy. I partially cover the pot to allow some steam to escape, which helps prevent a skin from forming. Stir every 10 minutes to distribute heat evenly. The chili should be thick enough to coat a spoon but still spoonable—if it's too thick, add 2-4 tablespoons broth.
Resting for Flavor Fusion
Let the chili rest for 10 minutes off the heat before serving. This resting period allows all the flavors to meld together and the textures to settle. I often find that the chili tastes even better the next day as the spices continue to develop. For serving, I like to remove the bay leaves and adjust seasoning with a pinch of salt or extra chili powder if needed. 💫
Nutrition facts
Frequently asked questions
Can I substitute ground beef for the pork in this recipe?
You can, but pork adds a unique richness and tenderness that beef doesn't match. If substituting, use 80% lean ground beef and reduce cooking time by 5 minutes since it browns faster. For best results, add 1 teaspoon liquid smoke to mimic pork's natural smokiness. The texture will be slightly firmer, but the flavor profile remains delicious.
How can I make this chili less spicy?
Start by reducing the chili powder to 1 tablespoon instead of 2 tablespoons. For extra mildness, add 1 cup sour cream or Greek yogurt at the end and stir well. If it's already cooked, mix in 2 tablespoons cornstarch slurry to thicken, then stir in 1/4 cup milk or broth to dilute the heat. A squeeze of lime also helps balance spice levels.
Can I make this chili in a slow cooker?
Brown the pork in a skillet first, then transfer everything to the slow cooker. Cook on low for 6-7 hours or high for 3-4 hours. The slow cooking enhances the pork's tenderness and deepens the flavors. Add 1/2 cup broth if it gets too thick during cooking. The cocoa powder should be added during the last 30 minutes of cooking to preserve its flavor.
What's the best way to reheat leftovers?
Reheat gently in a pot over medium-low heat with 2 tablespoons broth or water to restore moisture. Stir frequently to prevent sticking. For microwave reheating, use 50% power for 2-3 minutes, stirring halfway. Never reheat to a boil—this can make the beans mushy. If too thick, add a splash of broth. The chili actually tastes better reheated as flavors meld further.
Can I use canned black beans instead of dried?
Yes, canned beans work perfectly and save time. Drain and rinse them thoroughly to remove excess sodium. For extra creaminess, mash 1/2 cup of the beans before adding to create a thicker texture. If using dried beans, soak them overnight and cook until tender before adding to the chili. Canned beans are more convenient but may require a pinch of extra salt to balance flavors.