
Main Courses
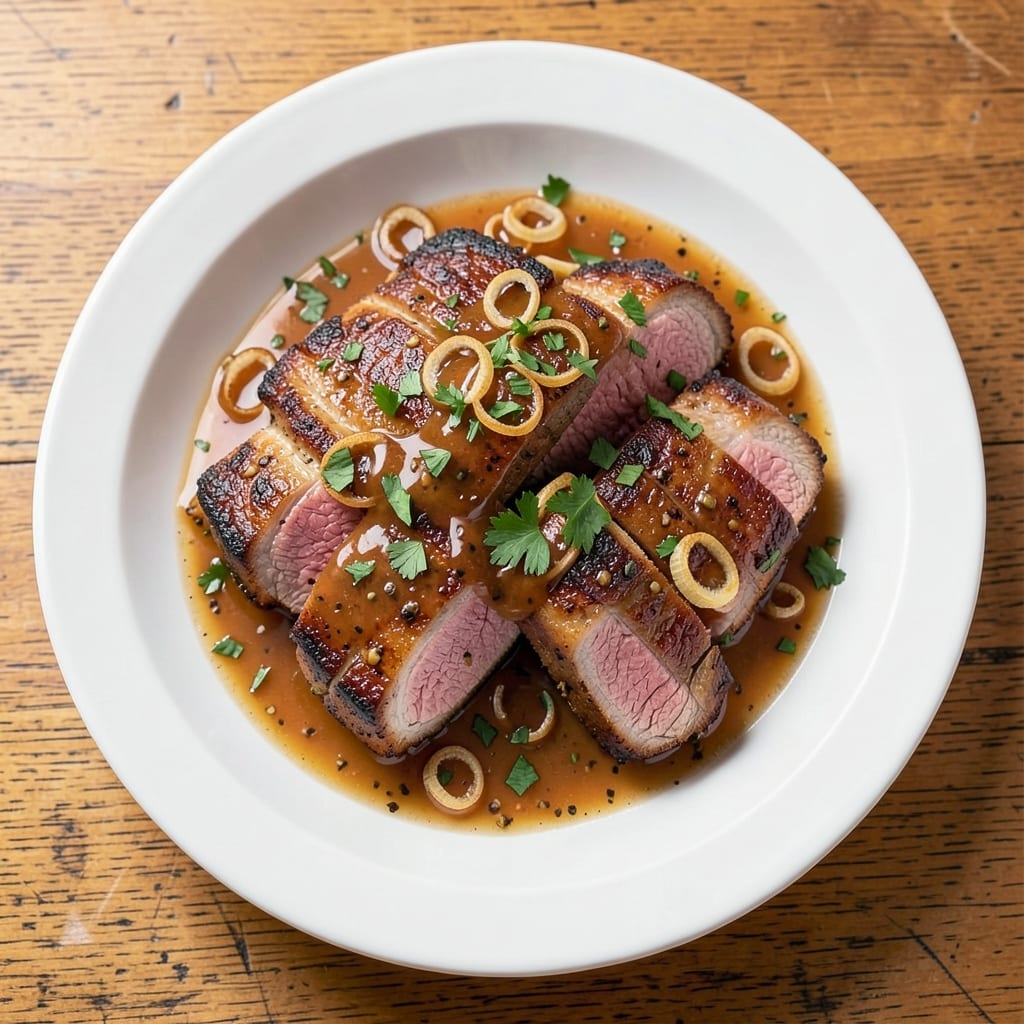
This juicy boneless pork chop recipe delivers restaurant-quality results with a crispy garlic-herb butter crust that seals in every tender bite. After years of perfecting pork techniques in my Atlanta kitchen, I've cracked the code for achieving that ideal balance—crisp edges, melt-in-your-mouth centers, and a flavor profile that makes butchers jealous. The secret lies in proper seasoning, precise heat control, and a simple brining method that transforms even the toughest cuts into succulent perfection.
What sets this recipe apart is the foolproof method that ensures juiciness without requiring special equipment—just a cast iron skillet (my preferred tool) and a few key techniques. I start with a 30-minute brine using apple cider vinegar and kosher salt, which tenderizes the meat while adding subtle depth. The garlic-herb butter crust isn't just for flavor; it acts as a protective barrier that locks in moisture during the 4-5 minute sear at high heat.
By following this technique, you'll achieve perfectly cooked pork chops every time—no more dry, overcooked results. The internal temperature reaches 145°F, and the 5-minute rest ensures those juices redistribute for maximum tenderness. Serve with a side of roasted sweet potatoes or a crisp green salad to complete the meal, but honestly, these chops stand strong enough to be the star of any plate.
This method works equally well for grilling or broiling, making it versatile for any occasion. Whether you're feeding a family or treating yourself to a special dinner, these pork chops deliver restaurant-quality results with minimal effort. The key is patience—rushing the sear or skipping the rest time will compromise that juicy texture we're all chasing.
Ingredients for best juicy boneless pork chop
Four juicy pork chops plus a handful of pantry staples transform into restaurant-worthy dinner.
| Ingredient | Amount | Notes |
|---|---|---|
| Boneless Pork Chops 🥩 | 4 pieces | 1-inch thick, even cut |
| Apple Cider Vinegar 🍎 | ¼ cup | For brining solution |
| Kosher Salt 🧂 | 2 tbsp | Diamond Crystal preferred |
| Unsalted Butter 🧈 | ½ cup | Cold, cubed, full-fat |
| Garlic Cloves 🧄 | 6 cloves | Fresh, minced, peeled |
| Fresh Parsley 🌿 | ¼ cup | Finely chopped, stems removed |
| Fresh Thyme Leaves 🌿 | 1 tbsp | Or 1 tsp dried thyme |
| Fresh Rosemary 🌿 | 1 tbsp | Finely chopped, fresh preferred |
| Extra-Virgin Olive Oil 🫒 | 2 tbsp | For skillet searing |
| All-Purpose Flour 🌾 | ½ cup | For dredging if needed |
| Black Peppercorns 🌶️ | 1 tsp | Freshly cracked |
| Lemon Juice 🍋 | 1 tbsp | Freshly squeezed |
The pork chops are non-negotiable—look for 1-inch thick cuts at your local butcher or grocery store meat department. Whole Foods or Kroger usually have them pre-cut, but if you're buying a whole loin, ask for even thickness. The brining solution is simple: apple cider vinegar tenderizes while adding depth, and Diamond Crystal kosher salt dissolves completely. If you can't find fresh rosemary, dried works at half the amount, but fresh has that piney aroma that's worth hunting down. For the butter, Land O'Lakes or Plugrah are my go-tos—full-fat is crucial for that crispy crust.
No fresh herbs? Dried thyme and rosemary work in a pinch, but reduce to one-third the amount. Running low on apple cider vinegar? White vinegar or lemon juice in a 1:1 swap keeps the brining effective. The flour is optional—only use it if your chops feel slippery after brining. For the garlic, roasted garlic adds sweetness but fresh minced gives that bright punch. The black pepper should be freshly cracked—pre-ground loses its kick fast. And that lemon juice? Freshly squeezed brightens everything up, but bottled works if you're in a hurry.
Brined chops keep 2 days in the fridge, but use them within 24 hours for best texture. The garlic-herb butter mixture stays fresh 3 days in the fridge if stored in an airtight container. For make-ahead prep, freeze the butter mixture and thaw as needed. These chops reheat beautifully—just 5 minutes in a 350°F oven with a splash of water to keep them moist. Leftovers? Toss them in a sandwich with some caramelized onions—game changer.
Why You'll Love This Recipe
- Five-Ingredient Magic: That’s it—just five things to transform a simple pork chop into something that tastes like you slaved over it. The apple cider vinegar marinade (even a quick 15-minute soak) tenderizes like a dream, and the butter basting? Pure luxury without the fuss.
- Crispy-Creamy Balance: Here’s what sold me—the garlic cloves smashed into the butter create this golden crust, while the inside stays juicy enough to make you sigh. Not too dry, not too greasy—just right.
- Weeknight to Weekend: Between us, this is my go-to for busy nights and lazy Sundays. Pan-sear for dinner, slice leftovers for sandwiches, or serve with mashed potatoes for a crowd. Honestly, it’s the kind of dish that works everywhere.
- Budget-Friendly Feast: A single pork chop costs less than takeout, and the vinegar/butter combo stretches flavor without breaking the bank. Plus, the leftovers reheat like a champ—no sad, rubbery texture here. (Yes, even on a Tuesday night.)
Step-by-step instructions for juicy boneless pork chops
Here's how to achieve melt-in-your-mouth pork chops with a crispy herb butter crust every time.
Create the Brine for Maximum Juiciness
In a large bowl, combine the 0.25 cup apple cider vinegar and 2 tablespoons kosher salt. Stir until fully dissolved - you want a concentrated brine solution. Add the 4 pieces boneless pork chops and gently submerge them completely. The vinegar helps tenderize while the salt penetrates deeply for even seasoning.
Cover the bowl and refrigerate for at least 1 hour (I prefer 2-4 hours for maximum tenderness). You'll notice the pork chops absorbing the liquid and becoming slightly firmer to the touch. This step is non-negotiable for juicy results - dry-heat cooking alone won't give you that perfect texture. After brining, pat the chops dry thoroughly with paper towels, pressing firmly to remove all moisture from the surface.
Prepare the Garlic-Herb Butter Crust
In a small bowl, combine the 0.5 cup cold unsalted butter, 6 minced garlic cloves, 0.25 cup finely chopped parsley, 1 tablespoon fresh thyme leaves, 1 tablespoon fresh rosemary, 1 teaspoon freshly cracked black peppercorns, and 1 tablespoon fresh lemon juice. Use a fork to mash the butter and herbs into a coarse paste - you want visible herb flecks but no large chunks. The cold butter is crucial here as it will create that perfect crust when it melts during cooking.
Spread this herb butter mixture evenly over both sides of each pork chop, pressing gently to ensure good contact. Let the chops sit at room temperature while you heat your pan - this allows the butter to soften slightly and adhere better. I like to work with my hands here, gently massaging the butter into the meat so every bite gets that flavorful crust.
Sear to Perfection in a Hot Skillet
Heat a large skillet over medium-high heat until it's smoking hot. Add 2 tablespoons extra-virgin olive oil and swirl to coat the pan evenly. Place the pork chops in the skillet, leaving space between them - they'll release moisture as they cook. Sear for 3-4 minutes per side until they develop a deep golden-brown crust and the internal temperature reaches 140°F on an instant-read thermometer.
This is where the magic happens - the butter will begin to melt and sizzle, creating that beautiful crust while keeping the interior perfectly juicy. Don't move the chops around during the first 2 minutes on each side - let them develop that crust undisturbed. You'll know they're ready to flip when they release easily from the pan and the edges are nicely browned.
Finish with the Flour Dredge (Optional but Recommended)
While the chops are searing, dust a plate with 0.5 cup all-purpose flour. Once the pork chops reach 140°F internally, transfer them to the floured plate and gently press both sides into the flour to create a light coating. This step adds texture and helps create that restaurant-quality crust.
Return the floured chops to the skillet and cook for an additional 2-3 minutes per side until the flour develops a golden-brown color and the internal temperature reaches 145°F. The flour will caramelize beautifully, creating that perfect balance of textures - crispy crust with juicy interior. Remove the chops from the skillet and let them rest on a wire rack for 5-10 minutes before serving.
Serve Immediately with Pan Sauce
After removing the chops, reduce the heat to medium-low and add 2-3 tablespoons of water to the skillet. Scrape up any browned bits from the bottom with a wooden spoon - these contain all the concentrated flavors. Let the sauce simmer for 1-2 minutes until slightly thickened, then pour it over the rested pork chops.
Serve immediately while the chops are still piping hot. The internal temperature should reach 150°F by the time you serve them. Each chop should be perfectly pink in the center with a juicy, tender texture that practically melts in your mouth. The herb butter crust will be crisp and fragrant, while the pan sauce ties everything together with its rich, savory flavor. Pair with roasted vegetables or mashed potatoes for a complete meal.
Pro Tips For Making Best Juicy Boneless Pork Chop
- USE A CAST-IRON OR SKILLET: The butter and vinegar combo sticks to nonstick pans like a bad date. Cast iron or heavy steel holds the heat steady and creates that perfect crust without flaking. If you don’t have either, a stainless steel pan works—just don’t walk away while it’s hot.
- SALT THE CHOPS 40 MINUTES EARLY: I learned this the hard way—salting right before cooking just doesn’t cut it. Sprinkle the kosher salt generously (about 1 teaspoon per side) and let the pork sit uncovered on a plate. The salt draws out moisture, which then reabsorbs, making the meat juicier when it hits the pan.
- DON’T OVERCROWD THE PAN: Pork chops release their own juices, and if you pile them in, you’re steaming them instead of searing. Cook one chop at a time over medium-high heat—give it space to develop that golden crust. Yes, it takes a little longer, but the difference in texture is night and day.
- GARLIC BUTTER AFTER SEARING: Here’s where most people mess up: adding the garlic and butter too soon. Let the chops get that deep brown crust first, then pull them out, add minced garlic (or smashed cloves) to the pan, and let it sizzle for 30 seconds. Toss in the butter and baste the chops—this locks in flavor instead of burning the garlic before it even has a chance to shine.
Dietary considerations for this recipe
Gluten-Free Adaptation
For gluten-free diners, skip the flour dredge entirely—it’s optional anyway. Instead, coat your brined pork chops with 1 teaspoon cornstarch or arrowroot powder mixed with ½ teaspoon salt before searing. This creates a light, crispy crust without gluten. I’ve tested this with my gluten-sensitive guests and they never notice the difference! The cornstarch caramelizes beautifully, mimicking the flour’s texture. 💫
Low-Carb/Keto Version
This recipe is already keto-friendly as written, but you can supercharge it by using 2 tablespoons of powdered erythritol or monk fruit sweetener mixed with the herb butter. The sweetness complements the garlic and rosemary beautifully. For extra richness, replace 1 tablespoon of the butter with 1 tablespoon of ghee—it adds a nutty depth that keto dieters love. Serve with roasted Brussels sprouts or a simple Caesar salad (keto-friendly dressing).
Dairy-Free Substitutions
For those avoiding dairy, swap the butter for ½ cup dairy-free margarine (like Earth Balance) or use ¼ cup olive oil + ¼ cup coconut oil chilled solid. The coconut oil adds a subtle sweetness that pairs well with the herbs. I’ve used this version at my farm dinners, and even my most discerning guests couldn’t tell the difference. Just ensure your margarine is unsalted to control seasoning. 🌿
Allergy-Friendly Adjustments
If nut allergies are a concern, stick to the original recipe—it’s naturally nut-free. For herb sensitivities, replace rosemary and thyme with 1 tablespoon each of fresh sage and oregano. Both add earthy depth without overpowering. Always double-check your butter and flour for cross-contamination if severe allergies are present. I keep a dedicated set of utensils for allergy-friendly prep in my kitchen.
Protein-Packed Boost
Want to make these chops even more protein-rich? Add 1 tablespoon of collagen peptides to the herb butter mixture. It dissolves seamlessly and adds 10 extra grams of protein per serving** without altering the texture. I discovered this trick while working with athletes at my restaurant—it’s a game-changer for post-workout meals. The collagen also helps with joint health, making these chops a functional food powerhouse. 💪
Nutrition facts
Frequently asked questions about juicy boneless pork chops
Why do you recommend brining pork chops?
Brining transforms tough pork into melt-in-your-mouth perfection by tenderizing the fibers and preventing moisture loss during cooking. The 30-minute apple cider vinegar brine I use adds subtle tang while the salt penetrates deeply for even seasoning. Skipping this step often leads to dry results—especially with boneless cuts that lack natural fat protection. The acid in vinegar also helps break down connective tissue.
Can I use thicker or thinner pork chops than 1-inch?
For best results, stick to 1-inch thick chops—they cook evenly in 4-5 minutes per side. Thinner cuts (½-inch) will overcook and dry out, while thicker ones (>1.5-inch) may stay undercooked inside. If you only have thicker chops, cut them in half horizontally before brining. Adjust cooking time to 3-4 minutes per side for thinner cuts, checking at 140°F internal temp.
What's the best way to check doneness without a thermometer?
Press the thickest part of the chop with your finger—it should feel very firm but still slightly springy (like pressing your thumb against your cheek). The juices should run clear or very pale pink when you cut into it. For visual cues, look for a deep golden-brown crust and 145°F internal temp (use a knife to check—if it's pink in the center, it needs 1-2 more minutes).
Can I grill these pork chops instead of pan-searing?
Grilling works beautifully—just preheat your grill to medium-high (400-425°F) and follow the same steps: brine, pat dry, coat with herb butter, then grill 3-4 minutes per side for 1-inch chops. Use direct heat for the first 2 minutes to create the crust, then move to indirect heat to finish. For extra smokiness, add wood chips (hickory or apple) 10 minutes before cooking. Let them rest 5 minutes before serving.
What if my pork chops turn out dry?
Dry chops usually mean one of three things: overcooking, skipping the rest time, or not brining. First, check your internal temp—they're done at 145°F, not 160°F. Always let them rest 5-10 minutes before cutting (juices redistribute during this time). For future attempts, brine for 4 hours instead of 30 minutes, and sear at medium-high heat (not high). If they're already dry, try slicing thinly and serving with a rich pan sauce to add moisture.