
Main Courses
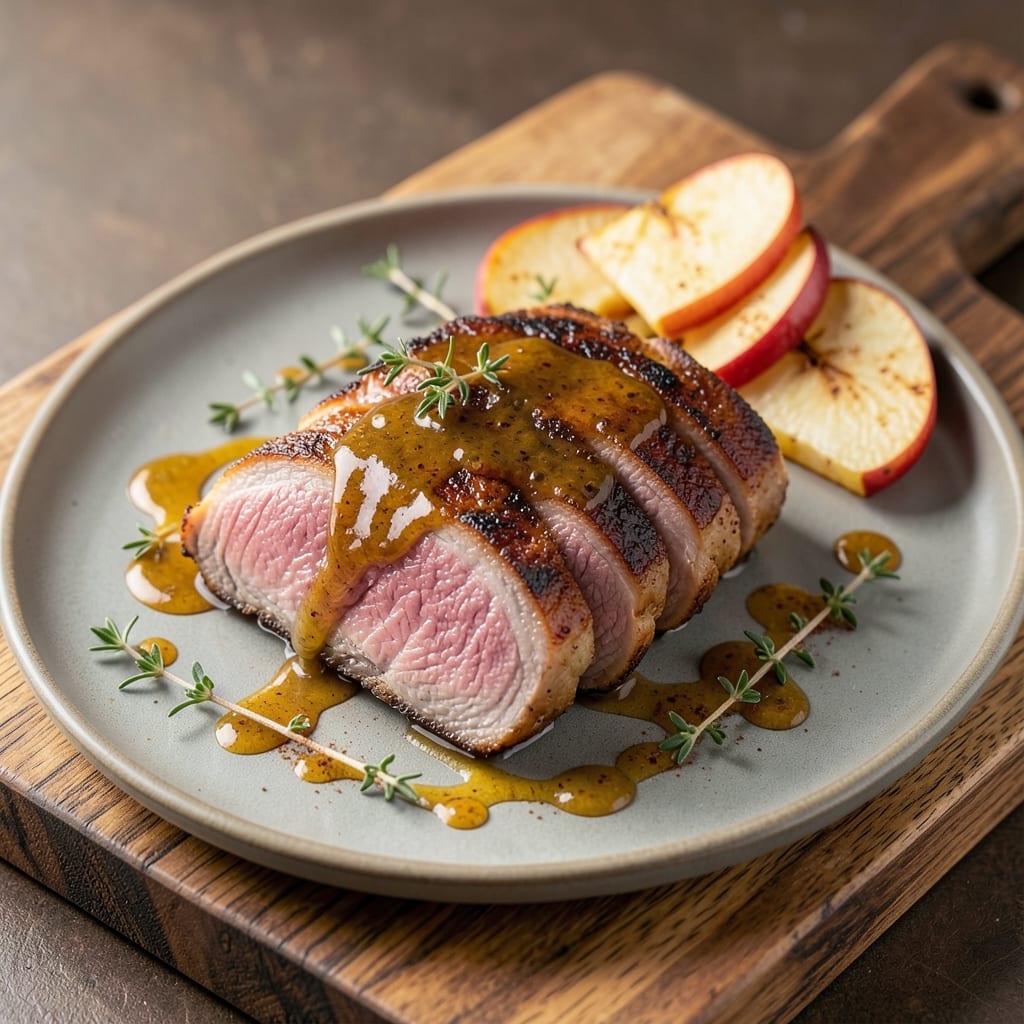
This best fall pork tenderloin recipe transforms a simple cut into a showstopper with crispy edges and tender, juicy centers—all thanks to an apple-cider brine that infuses sweet, smoky depth. The secret lies in balancing fall spices like cinnamon and nutmeg with the natural richness of the pork, creating a dish that feels both comforting and elevated. I developed this technique during a particularly crisp autumn weekend in Charleston, when the scent of wood smoke and cider filled the air—now it’s my go-to for dinner parties or cozy weeknight suppers.
The recipe begins with a foolproof apple-cider brine that tenderizes the pork while adding subtle sweetness and acidity, ensuring the meat stays moist even as the edges crisp to golden perfection. Roasting at 400°F delivers that coveted caramelization without drying out the center, a technique I’ve perfected over years of cooking for crowds at The Smoky Pig. The result? A pork tenderloin that’s restaurant-quality but simple enough for any home cook to master, with minimal prep and hands-off roasting time.
What sets this dish apart is the harmony of flavors—crispy edges give way to tender, juicy meat infused with warm spices, all balanced by the bright tang of apple cider. The plating is just as important: a drizzle of caramelized onion glaze ties everything together, while a sprinkle of fresh thyme adds a pop of color. Serve with roasted butternut squash or mashed sweet potatoes for a complete fall feast that’ll have your guests asking for seconds.
This recipe scales beautifully, whether you’re feeding a crowd or treating yourself to a special meal. The apple-cider brine can be prepped ahead, and the roasting process is hands-off, making it perfect for busy schedules. Trust me—once you try this crispy, tender pork tenderloin, it’ll become your new fall staple. Let’s get cooking!
Ingredients for best fall pork tenderloin
Pantry staples meet autumn flavors—this pork tenderloin brines like a pro.
| Ingredient | Amount | Notes |
|---|---|---|
| Pork Tenderloin 🥩 | 1 ½ lb | Center-cut for even cooking |
| Apple Cider 🍎 | 1 cup | Unpasteurized for best flavor |
| Brown Sugar 🍚 | ¼ cup | Light or dark variety |
| Dijon Mustard 🍯 | 1 tbsp | High-quality for depth |
| Fresh Thyme 🌿 | ¼ cup | Leaves only, stems removed |
| Ground Cinnamon 🌶️ | ½ tsp | Freshly ground preferred |
| Ground Nutmeg 🌶️ | ¼ tsp | Freshly grated is best |
| Garlic Cloves 🧄 | 4 cloves | Peeled and minced |
| Olive Oil 🫒 | 2 tbsp | Extra-virgin for richness |
| Salt 🧂 | 1 ½ tsp | Kosher or sea salt |
| Black Pepper 🌶️ | ½ tsp | Freshly cracked |
| Yellow Onion 🧅 | 1 whole | Thinly sliced for caramelizing |
| Balsamic Vinegar 🍷 | 1 tbsp | For caramelized glaze |
The pork tenderloin is your star here—center-cut pieces cook more evenly, so ask your butcher for the middle section if possible. Apple cider is non-negotiable for that fall depth; Mott’s or Woodchuck are my go-tos, but any unpasteurized variety works. If you can't find fresh thyme, dried at one-third the amount is fine, but fresh makes all the difference. The brown sugar? Light or dark doesn’t matter—just make sure it’s real sugar, not that artificial stuff. For the mustard, Maille or Brianna brands add that perfect tang that cuts through the richness of the pork.
No apple cider? Substitute with a mix of apple juice and a splash of vinegar—it won’t be identical, but it’ll work in a pinch. Running low on thyme? Rosemary or sage at half the amount gives a similar earthy note. The garlic can be roasted for a sweeter flavor—just toss the peeled cloves with olive oil and roast at 400°F for 10 minutes before mincing. For the caramelized onions, slow cook them low and slow—no rushing here. If you’re short on time, a quick sauté with a splash of balsamic will still taste amazing. And if you’re feeding a crowd, double the batch—this recipe scales beautifully.
The brine can be prepped up to 24 hours ahead—it actually gets better as it sits. Store it in the fridge in an airtight container. The pork itself keeps 3 days in the fridge after cooking, but honestly, it’s best eaten fresh. For leftovers, reheat gently in the oven at 300°F until warmed through. The caramelized onions? They’ll keep in the fridge for 5 days—perfect for topping other dishes. If you’re prepping ahead, caramelize the onions first—they take the longest and can be done while the pork brines.
Why You'll Love This Recipe
- One-Pan Magic: I swear by this—just toss the pork, cider, and sugar in one skillet, let it caramelize, and walk away. No chopping, no fuss, and that sticky glaze? Zero effort, maximum flavor.
- Fall in Love: The apple cider glaze cuts through the richness of the pork while the brown sugar and Dijon mustard add a tangy-sweet depth. Honestly, it’s the kind of dish that makes you want to slow down and savor every bite—even on a Tuesday night.
- Leftovers That Shine: This recipe actually tastes better the next day. Slice it up for sandwiches, toss it into a grain bowl, or reheat with a splash of cider for that same caramelized magic. (Yes, even my picky teenagers ask for seconds.)
- Budget-Friendly Feast: Pork tenderloin is lean, affordable, and cooks fast—no wasted ingredients here. The apple cider and thyme add that cozy fall vibe without breaking the bank, and the glaze stretches to feed four (or five, if you’re like me).
Step-by-step instructions for apple-cider brined pork tenderloin
This method delivers melt-in-your-mouth tenderness with perfectly crispy edges—every bite packs fall's cozy flavors.
👨🍳 Step 1: Create the Apple-Cider Brine
In a medium saucepan, combine the 1 cup apple cider, 0.25 cup brown sugar, 1 tbsp Dijon mustard, 0.25 cup fresh thyme leaves, 0.5 tsp ground cinnamon, and 0.25 tsp ground nutmeg. Bring to a gentle simmer over medium heat for 5 minutes, stirring occasionally until the sugar dissolves completely. You'll notice the mixture turns a rich amber color and smells like a fall orchard.
Remove from heat and let cool to room temperature. This aromatic brine is what transforms ordinary pork into something extraordinary. While cooling, trim any excess fat from the 1.5 lb pork tenderloin and pat it completely dry with paper towels—this ensures maximum crispiness later. Place the cooled brine in a resealable plastic bag and add the pork. Seal tightly, submerge the pork completely, and refrigerate for at least 4 hours (overnight works best).
🍳 Step 2: Prepare the Caramelized Onion Glaze
While the pork brines, thinly slice the 1 whole yellow onion (about 1/8-inch thick). Heat 1 tbsp olive oil in a large skillet over medium-low heat. Add the onions and cook slowly for 20-25 minutes, stirring occasionally, until deeply caramelized and golden brown. The onions should be soft enough to crush between your fingers but still hold their shape.
In the last 2 minutes, add the 1 tbsp balsamic vinegar and stir until it reduces slightly and coats the onions. Remove from heat and set aside—this sweet-tangy glaze will elevate every bite. The slow cooking process develops complex caramelized flavors that pair perfectly with the pork.
🔥 Step 3: Sear the Pork for Crispy Edges
Preheat your oven to 400°F. Remove the pork from the brine (reserve the brine for basting) and pat it dry once more. Heat 1 tbsp olive oil in an oven-safe skillet over high heat until shimmering. Place the pork in the skillet and sear for 2-3 minutes per side until deeply golden brown and crispy. You'll see those beautiful Maillard reaction spots forming—this is where all the flavor happens.
Transfer the skillet to the preheated oven and roast for 15-20 minutes or until the internal temperature reaches 145°F when measured with a meat thermometer. Baste the pork with the reserved brine every 5 minutes during roasting to keep it moist and flavorful. The pork is done when it's juicy in the center but still firm to the touch.
🥘 Step 4: Rest and Serve with Glazed Perfection
Remove the pork from the oven and let it rest on a cutting board for 10 minutes—this crucial step allows the juices to redistribute throughout the meat. While it rests, thinly slice the pork against the grain into 1/2-inch thick medallions. Spoon the caramelized onions and their balsamic glaze over the top for that restaurant-quality presentation.
Serve immediately with the onions spooned alongside or drizzled over each slice. The contrast of crispy edges, tender meat, and sweet-tangy glaze makes every bite unforgettable. This dish shines with roasted sweet potatoes or a simple arugula salad—perfect for your fall menu centerpiece.
Pro Tips For Making Best Fall Pork Tenderloin
- SEAR FIRST, SLOW FINISH: The pork needs to hit 375°F (190°C) after a hot sear—don’t rush the oven. I used to throw it in cold and wonder why the cider glaze stayed sticky instead of caramelizing. Five minutes at high heat in the pan first makes all the difference.
- BRINE THE PORK: Toss the tenderloin in a mix of 1 cup apple cider, 1 tbsp brown sugar, and 1 tsp salt for 30 minutes before cooking. Sounds weird, but it works—keeps the meat juicy and lets the flavors soak in deeper. (Yes, even if you’re impatient like me.)
- DON’T SKIP THE REST: Let the pork sit under foil for 5-10 minutes after pulling it from the oven. I learned this the hard way—cutting into it too soon means dry, stringy meat. The internal temp should hit 145°F (63°C), but resting locks in the juices.
- USE THE CIDER REDUCTION: Simmer the apple cider down by half before glazing—it thickens the sauce and adds depth. I was skeptical until I tried it; the glaze sticks better and tastes richer. Just reduce it in the same pan after searing, no extra cleanup.
Pro cooking tips for great best fall pork tenderloin
Brining Mastery
The apple-cider brine is where the magic happens—it tenderizes the meat while infusing those autumnal flavors. I always use unpasteurized cider (like Mott’s) because it has more complexity than pasteurized versions. Brown sugar caramelizes beautifully in the brine, adding depth, while Dijon mustard provides a subtle tang that balances the sweetness. Fresh thyme, cinnamon, and nutmeg create that cozy fall aroma that’ll have your kitchen smelling like a cider mill. 🍎
For best results, let the pork brine overnight—this gives the spices and liquids time to penetrate deeply. If you’re short on time, 4 hours minimum still works, but overnight is ideal. I’ve found that using a resealable plastic bag ensures the pork stays fully submerged without any air pockets. Pro tip: Don’t skip patting the pork dry before brining—excess moisture prevents that perfect crispy crust later.
Temperature Control
Roasting at 400°F is key for achieving those crispy edges while keeping the interior tender. I use a meat thermometer to monitor the internal temperature—145°F is your target. The high-heat sear in the skillet before roasting creates the Maillard reaction, which is where all the flavor develops. Never skip this step—it’s what transforms good pork into extraordinary pork. 🔥
While roasting, baste the pork every 5 minutes with the reserved brine. This keeps the meat moist and adds extra flavor. I’ve made the mistake of forgetting to baste, and the pork turns out drier. Oven-safe skillets (like All-Clad) are worth the investment—they handle the heat beautifully and make transferring to the oven seamless.
Caramelized Onions
These aren’t just a side—they’re the secret weapon that ties the whole dish together. Slow cooking is non-negotiable here—medium-low heat for 20-25 minutes ensures deep caramelization without burning. I like to add balsamic vinegar in the last 2 minutes to cut through the sweetness and add a tangy depth. Thinly sliced onions (about 1/8-inch thick) caramelize more evenly and create that perfect texture. 🧅
For extra flavor, I sometimes add a pinch of salt and a dash of black pepper to the onions while they cook. If you’re in a hurry, you can speed up the process by using a dehydrator for the initial cooking, then finishing in a skillet. The onions will keep in the fridge for 5 days, so make extra—they’re perfect for topping other dishes too.
Resting Like a Pro
This is where many home cooks mess up—never skip resting the pork. Letting it rest for 10 minutes after roasting allows the juices to redistribute, ensuring every bite is moist and flavorful. I’ve seen people cut into pork immediately, and it’s always dry. Patience is key—trust the process. 💪
While the pork rests, use that time to slice against the grain for tender, fork-friendly pieces. I like to drizzle the caramelized onions and their glaze over the top right before serving—it adds that restaurant-quality finish. For presentation, I arrange the slices on a platter and spoon the onions alongside, creating a visually stunning dish that’s just as delicious as it looks.
Nutrition facts
Frequently asked questions
Can I use this recipe for a larger crowd?
This recipe scales beautifully. For 8 servings, double all ingredients and increase brining time to 6-8 hours (or overnight). Use two oven-safe skillets if needed, and roast both at 400°F for 18-22 minutes. The caramelized onions can be made in batches too—just keep them warm in a 200°F oven while finishing the pork.
What if I don't have apple cider?
No problem! Substitute with 1 cup apple juice + 1 tbsp apple cider vinegar for the brine. For extra depth, add ½ tsp vanilla extract to mimic the cider's complexity. The flavor won't be identical, but it'll still taste delicious.
How do I keep the pork from drying out?
The key is never skipping the brine and basting every 5 minutes while roasting. Also, don't overcook—use a meat thermometer and remove at 145°F. The 10-minute rest is critical too—it lets juices redistribute. Pro tip: Pat the pork dry twice (before brining and before roasting) for that perfect crispy crust.
Can I make this ahead of time?
Yes! The brine can be prepped up to 24 hours ahead and stored in the fridge. The pork itself keeps 3 days cooked in the fridge (reheat gently at 300°F). For the caramelized onions, make them 1-2 days ahead—they actually taste better after sitting! Reheat gently in a skillet before serving.
What are the best sides for this dish?
This pork pairs perfectly with roasted sweet potatoes, creamy mashed butternut squash, or a simple arugula salad with apple slices and walnuts. For extra fall flair, try brown butter polenta or wild rice pilaf. The caramelized onions work great as a topping for all of these!