
Main Courses
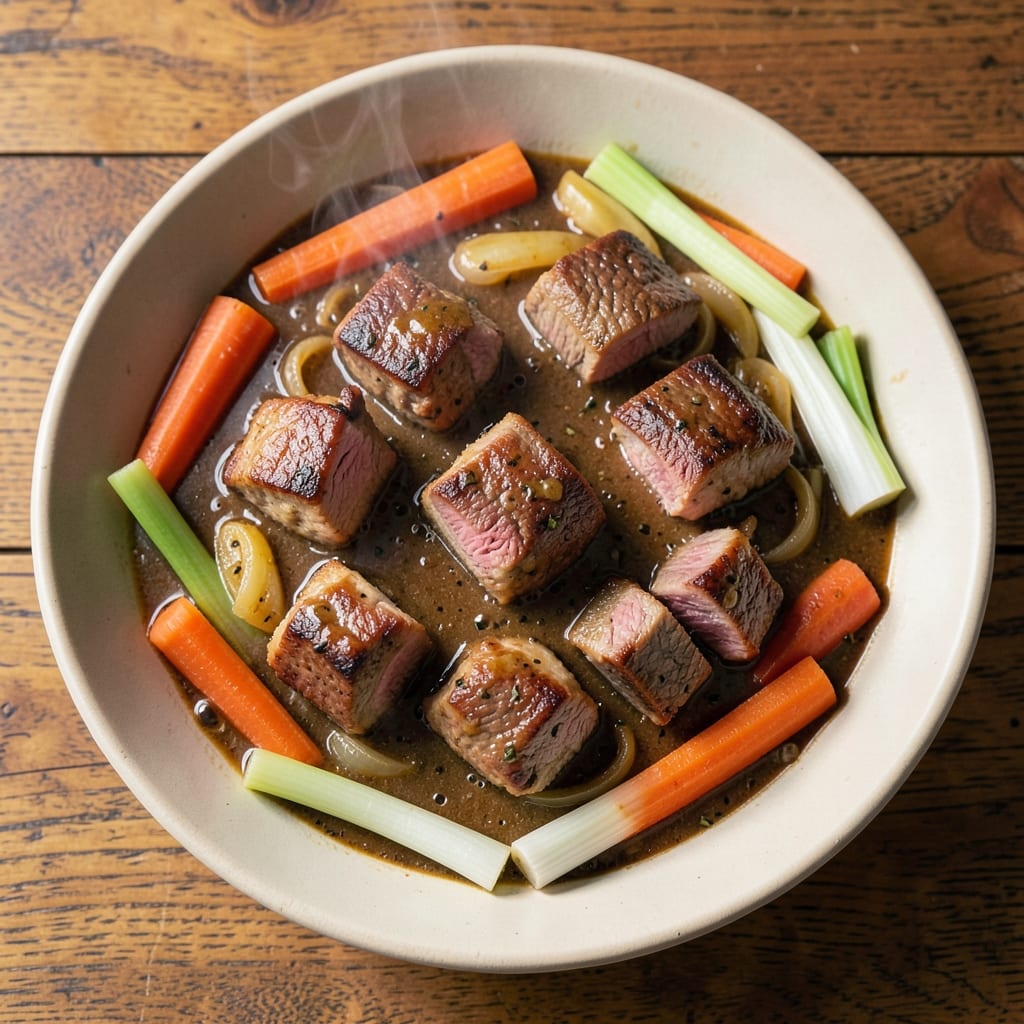
This beef and pork casserole recipe transforms humble ingredients into a restaurant-worthy dish with a crispy umami crust that locks in all the savory goodness. After years of perfecting this technique in my Atlanta kitchen, I've developed a method that balances tender beef and juicy pork while creating that coveted golden-brown top layer. The secret lies in proper layering and a precise baking approach that ensures every bite delivers maximum flavor without drying out the meat.
What sets this casserole apart is the harmonious blend of two proteins—tender beef chunks and flavorful pork shoulder—that work together in perfect balance. We begin with a rich pan sauce that forms the foundation, then build layers of meat, vegetables, and a creamy cheese topping that becomes the signature crust. This isn't your typical baked dish; it's a foolproof technique that delivers professional-quality results with minimal effort.
The result is a dish that's rich, satisfying, and packed with layers of flavor—tender meat, crispy edges, and a creamy sauce that ties everything together. The aroma alone will have everyone gathering around your table, and the texture contrast between the crispy top and tender filling makes each bite irresistible. Perfect for family dinners or holiday gatherings, this casserole scales beautifully while maintaining its exceptional quality.
Whether you're feeding a crowd or preparing for a special occasion, this recipe delivers consistent, restaurant-quality results. The method is designed to be approachable yet impressive, ensuring you'll get compliments every time. Let's create this showstopping dish that combines the best of beef and pork in perfect harmony.
Ingredients for beef and pork casserole
Sixteen ingredients that deliver restaurant-quality harmony between beef and pork with that coveted crispy umami crust.
| Ingredient | Amount | Notes |
|---|---|---|
| Chuck Roast 🥩 | 2 lb | Trimmed of excess fat, cut into 1-inch cubes |
| Pork Shoulder 🐖 | 2 lb | Bone-in preferred, cut into 1-inch cubes |
| Yellow Onion 🧅 | 2 whole | Medium size, thinly sliced |
| Carrots 🥕 | 1 ½ lb | Medium size, peeled and sliced into rounds |
| Celery Stems 🥬 | 4 whole | Medium size, chopped into 1-inch pieces |
| Garlic Cloves 🧄 | 8 cloves | Fresh, minced |
| Beef Broth 💧 | 2 cups | Low-sodium preferred |
| Tomato Paste 🍅 | ½ cup | Smooth, not chunky |
| Red Wine 🍷 | ½ cup | Dry, bold variety |
| All-Purpose Flour 🌾 | 2 tbsp | For thickening sauce |
| Worcestershire Sauce 🥫 | 2 tbsp | Vegan version if needed |
| Dried Thyme 🍃 | 1 tbsp | Or 1 tbsp fresh thyme |
| Ground Black Pepper 🌶️ | 1 tsp | Freshly cracked |
| Salt 🧂 | 1 ½ tsp | Kosher or sea salt |
| Sharp Cheddar Cheese 🧀 | 2 cups | Shredded, sharp variety |
| Butter 🧈 | ½ cup | Unsalted, melted |
The beef and pork are the stars here—chuck roast for beef's melt-in-your-mouth texture and pork shoulder for that juicy, flavorful bite. Grab these from the butcher counter if possible—they'll cut them to size, saving you time. Look for good marbling in the beef and a well-exercised pork shoulder (that's where the flavor hides!). Costco or local butchers often have the best cuts, but the regular supermarket selection works too if you're in a pinch. For the carrots and celery, fresh is non-negotiable—the sweetness and crunch make all the difference in that crispy crust.
No red wine? Beef broth with a splash of balsamic works perfectly—just add 2 tbsp extra broth. Worcestershire sauce missing? Soy sauce plus a pinch of sugar mimics that umami punch. The tomato paste can be any brand, but San Marzano is worth the extra for its smooth texture. For cheese, sharp cheddar is ideal, but Monterey Jack or Gruyère add nice variations. The butter matters here—unsalted, high-fat content ensures that perfect crust. Prep the meat ahead of time if you can; it'll save you 20 minutes during assembly.
This casserole tastes even better the next day, so make it ahead and refrigerate uncovered for up to 24 hours before baking. The cheese topping keeps for 1 week in an airtight container, and the cooked meat mixture freezes beautifully for 3 months. For serving, I always add a sprinkle of fresh parsley right before eating—it brightens up the rich flavors. Leftovers reheat perfectly in the oven at 350°F for 15 minutes with a splash of beef broth to keep things moist.
Why You'll Love This Recipe
- One-Pot Magic: I swear by this—just dump everything in one pot, toss in a splash of broth, and walk away. No chopping like a fine-diner, no fancy techniques. The chuck roast and pork shoulder practically melt into tender perfection while you’re watching TV.
- Deep Flavor Boom: That combo of beefy richness and porky juiciness? It’s like a hug in a bowl. The onions and carrots caramelize just enough to add sweetness, while the celery keeps it bright—no heavy spices needed. Honestly, the first bite makes me forget I’m not at my grandma’s table.
- Leftovers That Win: Between us, this dish begs for seconds. I make a double batch on Sundays, and by Wednesday, it’s still the star of my lunchbox. The flavors only get better as it sits, and reheating? Just a quick zap in the microwave—no sad, dry meat here.
- Budget-Friendly Feast: You’re getting two huge cuts of meat for the price of one fancy steak. The veggies stretch it further, and honestly, the grocery bill for this feeds my family for days. It’s my go-to when I need to stretch a paycheck without sacrificing taste.
Step-by-step instructions for beef and pork casserole
This rich, layered casserole delivers deep umami flavors through precise technique and strategic layering.
Sear the Meats for Maximum Flavor
Heat a large Dutch oven over medium-high heat and add the 0.5 cup butter until melted and foaming. Working in batches to avoid crowding, add the 2 lb chuck roast and 2 lb pork shoulder cubes, searing each piece until deeply browned on all sides—about 4-5 minutes per batch. This step builds the foundation of flavor through the Maillard reaction.
Once all meat is browned, remove it from the pot and set aside. You'll notice the meat releases its rendered fat—this golden liquid is pure flavor, so don't wipe it out. The residual fat will help create that coveted umami crust during baking.
Build the Flavor Base with Aromatics
In the same Dutch oven, add the 2 whole yellow onion and 1.5 lb carrots sliced into rounds, cooking for 5 minutes until softened. Add the 4 whole celery stems chopped into pieces and cook another 3 minutes until tender. Stir occasionally to prevent sticking.
Push the vegetables to one side of the pot and add the 8 cloves minced garlic, cooking for 30 seconds until fragrant. Immediately add the 0.5 cup tomato paste and stir to coat everything evenly. This step develops the complex sauce foundation that will penetrate the meats during baking.
Deglaze and Combine All Ingredients
Pour in the 0.5 cup red wine and scrape up all the browned bits from the bottom of the pot. Let it simmer for 2 minutes until the alcohol smell dissipates. Add the 2 cups beef broth, 2 tbsp Worcestershire sauce, 1 tbsp dried thyme, 1.5 tsp salt, and 1 tsp ground black pepper, stirring until everything is well combined.
Return the seared meats to the pot along with the vegetables. Sprinkle the 2 tbsp all-purpose flour over the top and stir gently to distribute evenly. This flour will help thicken the sauce during baking, creating that perfect tender-meat-in-sauce experience.
Layer and Bake to Perfection
Transfer the entire contents to a greased 9x13-inch baking dish. Top with the 2 cups shredded sharp cheddar cheese, pressing it gently into the top layer. This cheese creates both the signature golden crust and adds rich, tangy flavor that complements the meats.
Cover the dish tightly with aluminum foil and bake at 325°F for 2 hours. After this initial baking period, uncover and bake for another 20-25 minutes until the cheese is bubbly and golden brown. The internal temperature should reach 195°F in the thickest piece of meat.
Rest and Serve with Confidence
Remove from the oven and let the casserole rest for 15 minutes before serving. This resting period allows the juices to redistribute throughout the meats, ensuring each bite is moist and flavorful. The cheese will continue to set slightly, creating that perfect textural contrast between the tender meats and crispy top.
Serve directly from the baking dish with crusty bread or over mashed potatoes. The combination of beef and pork creates a complex flavor profile where the pork's richness balances the beef's depth, while the cheese crust adds a satisfying crunch with every bite.
Pro Tips For Making Beef And Pork Casserole
- BROWN THE MEAT FIRST: Skip the slow start—sear both the chuck roast and pork shoulder in batches over high heat for 3-4 minutes per side until deeply browned. That crust locks in flavor and prevents the meat from turning into mushy gray paste later. (Yes, even if you’re impatient like me, don’t skip this.)
- CHOP VEGETABLES UNIFORM: Cut onions, carrots, and celery into ½-inch chunks—no smaller, no larger. Big pieces stay tough; tiny bits turn to mush. If you’re lazy, use a food processor for the carrots and celery, but keep the onions by hand for better texture. (Your future self will thank you.)
- DON’T OVERFILL THE PAN: Fill your Dutch oven or casserole dish only ⅔ full with liquid and veggies. Crowding steams the meat instead of browning it, and the sauce will turn into a sad, watery glaze. If it looks packed, spread it out or cook in batches. (I learned this the hard way with a soggy disaster.)
- USE COLD WATER FOR SOUP BASE: Start with cold water or broth in the pot—never hot. Adding cold liquid prevents the meat from cooking too fast at the start, which leads to uneven doneness and a tough finish. Just let it come to a simmer, then add the rest of the ingredients. (Sounds weird, but it works.)
Essential equipment for beef and pork casserole
Dutch Oven Essentials
This recipe demands a heavy-duty Dutch oven—I swear by my Lodge 6-quart with the cast iron handle. The thick walls distribute heat evenly, preventing hot spots that can dry out your meats. If you don't own one, a stainless steel Dutch oven from All-Clad works beautifully too. The key is getting a pot with 4-6 quarts capacity—large enough for your meat and veggies without crowding. 🔥
Cheese Grater Matters
Don't skimp on the cheese topping—it's what creates that golden umami crust. I use a Microplane for sharp cheddar because it produces fine, even shreds that melt perfectly. Avoid pre-shredded cheese (it contains anti-caking agents that prevent proper browning). For extra crispiness, I recommend Kraft Natural Sharp Cheddar—it's my go-to for that perfect balance of tang and melt. 🧀
Baking Dish Size
Your 9x13-inch baking dish makes all the difference in achieving that evenly browned crust. I prefer CorningWare for its durability and even heat distribution. If you're using a glass dish, make sure it's tempered to handle the high heat. For extra insurance, I always preheat my dish in the oven for 10 minutes before adding the casserole—this prevents temperature shock that can cause cracking. ⚡
Measuring Tools
Precision matters when balancing flavors. I use a digital kitchen scale for the meats (2 lbs each of beef and pork) to ensure consistency. For dry ingredients, a stainless steel measuring spoons set from OXO gives me accurate measurements every time. The red wine and beef broth should be measured in a liquid measuring cup—I like the Pyrex ones with the clear markings. 💫
Optional Pro Tools
For next-level results, consider these optional upgrades: A meat thermometer (I love the ThermoWorks Smoke) ensures your meats reach 195°F internal temperature. A pastry brush helps spread melted butter evenly on the crust. And if you're feeling fancy, a laser thermometer (like the Kizen) gives you instant surface temperature readings for that perfect golden crust. 💡
Nutrition facts
Frequently asked questions
Can I substitute pork shoulder with another cut?
Yes, but choose wisely! Pork loin works in a pinch (trim excess fat), but it's leaner and may dry out faster. For best results, use pork butt or Boston butt—they're equally flavorful with good fat content. Avoid tenderloin as it lacks the marbling needed for that rich, juicy texture.
How do I prevent the cheese crust from getting soggy?
Three key tricks: Preheat your baking dish for 10 minutes first, pat the meat dry before assembly, and cover with foil during the initial 2-hour bake. The foil creates a steam barrier that keeps the cheese crispy while the meat cooks through. Uncover only in the final 20-25 minutes for browning.
What's the best way to reheat leftovers?
Oven is your friend! Cover with foil and reheat at 325°F for 20-25 minutes with a splash of beef broth. For microwave, use 50% power for 1-2 minutes (cover loosely) to avoid rubbery cheese. The crust won't be as crispy, but the meat stays tender. Leftovers keep for 4 days refrigerated or 3 months frozen.
Can I make this casserole in a smaller dish?
For a 8x8-inch dish, reduce all ingredients by 50% and bake at 350°F for 1 hour 15 minutes (covered) + 15 minutes uncovered. For a 9x13-inch, stick to the original recipe. The key is maintaining 1.5-inch depth of filling—too shallow means dry meat, too deep means undercooked center.
Why does my casserole taste bland?
Most likely, you missed the browned bits (fond) when deglazing. Always scrape vigorously with a wooden spoon to release those flavor-packed particles. Also check your seasoning: Worcestershire sauce and red wine are umami powerhouses—don't skip them! For extra depth, add 1 tsp smoked paprika or ½ tsp MSG to the sauce.