
Main Courses
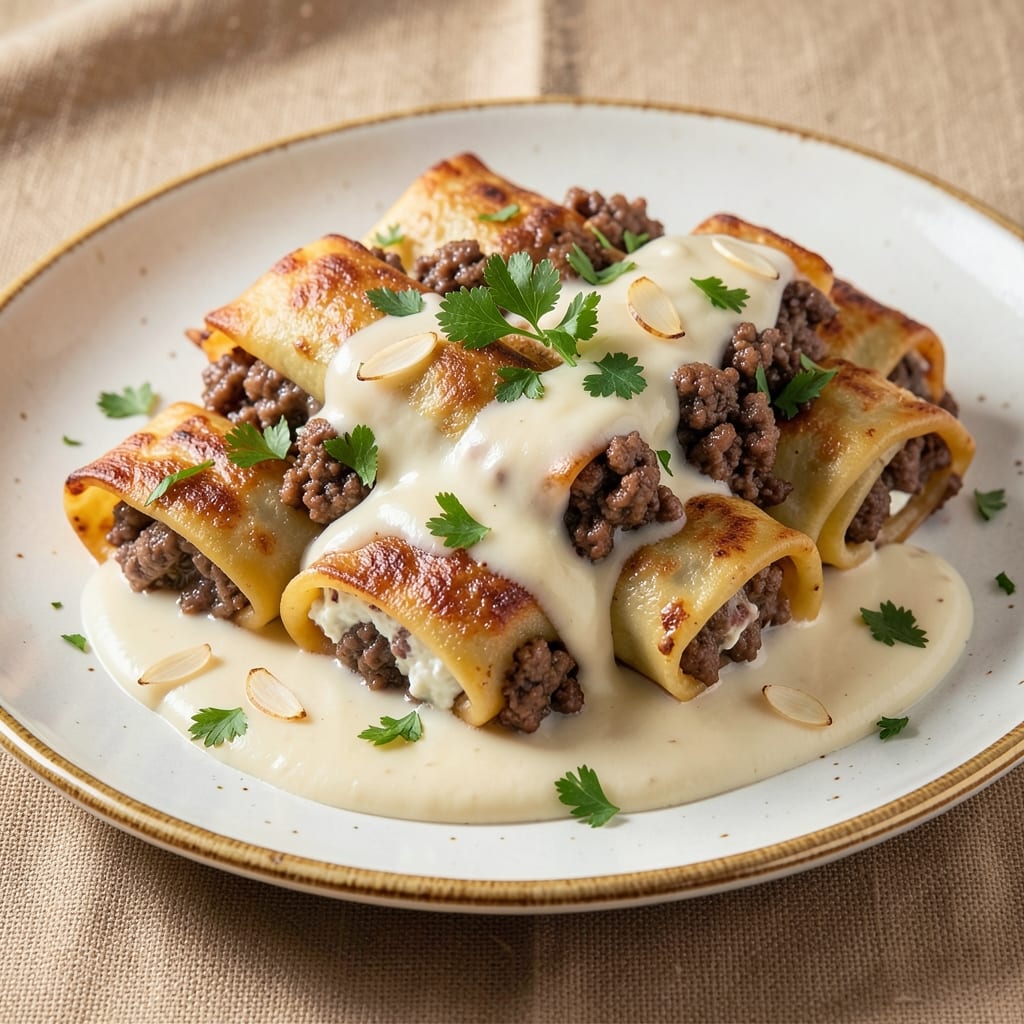
This beef and pork cannelloni recipe transforms simple ingredients into a restaurant-worthy centerpiece that always impresses. 💛 I developed it after years of perfecting meat fillings and pasta techniques—where rich, herbed cheese twists meet perfectly cooked meat in every bite. The secret lies in balancing tender, seasoned meat with a creamy sauce that clings to the pasta like it was made for it.
What sets this recipe apart is the foolproof method for assembling cannelloni without the usual mess. You'll start with a flavorful beef and pork mixture cooked just until tender, then pair it with a simple cheese filling that holds together beautifully when baked. The sauce—whether classic tomato or rich béchamel—becomes the star, creating layers of flavor in every forkful.
By the time you pull this dish from the oven, you'll have golden, bubbling cannelloni with crisp edges and tender centers. The herbed cheese twists add a textural contrast that elevates every bite, making this dish feel like a special occasion—even on a weeknight. The aroma alone will have everyone at the table asking what's for dinner.
Perfect for family dinners, holiday gatherings, or when you want to serve something that feels indulgent yet restaurant-quality. This recipe scales beautifully, so you can make it for a crowd or just a cozy night in. Let's get started on creating your next showstopper.
Ingredients for beef and pork cannelloni
Here's what you need to create restaurant-quality beef and pork cannelloni with herbed cheese twists.
| Ingredient | Amount | Notes |
|---|---|---|
| Ground Beef 🥩 | ¾ lb | 80/20 fat ratio preferred |
| Ground Pork 🐷 | ½ lb | Lean or regular, finely chopped |
| Yellow Onion 🧅 | 1 whole | Medium size, finely diced |
| Garlic Cloves 🧄 | 4 cloves | Fresh, minced |
| Fresh Parsley 🌿 | ¼ cup | Chopped, for meat filling |
| Ricotta Cheese 🧀 | 1 cup | Whole milk, room temperature |
| Parmesan Cheese 🧀 | ½ cup | Freshly grated, for cheese filling |
| Large Eggs 🥚 | 1 whole | For binding cheese filling |
| Cannelloni Shells 🍝 | 12 pieces | Fresh or pre-cooked, about 3 inches |
| Canned Crushed Tomatoes 🍅 | 14 ½ oz | San Marzano preferred, no salt added |
| Tomato Paste 🍅 | 2 tbsp | For sauce thickness |
| Heavy Cream 🥛 | ½ cup | Full-fat for richness |
| Unsalted Butter 🧈 | 2 tbsp | For sauce base |
| Dried Oregano 🌿 | 1 tsp | Italian preferred |
| Salt 🧂 | 1 ½ tsp | Adjust to taste |
| Black Pepper 🌶️ | ½ tsp | Freshly ground |
| Olive Oil 🫒 | 1 tbsp | For browning meat |
The meat is where the magic starts. Ground chuck for beef and ground pork from the butcher section (not pre-mixed) give you the best texture—leaner cuts can get dry. I always grab mine from Whole Foods or the local butcher shop, but the grocery store stuff works too. The ricotta needs to be whole milk—part-skim gets rubbery when baked. For the Parmesan, grate it yourself—pre-grated has anti-caking agents that ruin the texture. Fresh cannelloni shells are ideal, but if you're using dried, boil them just until al dente and keep them warm in a towel.
No ricotta? Cottage cheese blended smooth works in a pinch (blend with a splash of milk). Short on Parmesan? Pecorino Romano has a sharper bite. The crushed tomatoes can be swapped for whole peeled tomatoes roasted and crushed—they taste fresher. For the sauce, if you're making béchamel instead of tomato, use whole milk and roux made with butter and flour. The egg in the cheese filling is non-negotiable—it's what keeps everything from falling apart. If you're worried about raw egg, use pasteurized eggs or an egg substitute.
The meat filling keeps for 2 days in the fridge—make it ahead to save time. Cannelloni shells? Use within 1 day of cooking if fresh. The assembled dish reheats beautifully—cover with foil and bake at 375°F for 15-20 minutes. For make-ahead parties, assemble the cannelloni, wrap tightly in foil, and freeze. Bake straight from frozen, adding 10-15 extra minutes. The sauce can be made a day ahead too—just reheat gently and stir in fresh herbs before serving.
Why You'll Love This Recipe
- No Fuss Filling: I swear by this mix—ground beef and pork? That’s rich, juicy, and way more satisfying than either alone. The onions caramelize while you brown the meat, so you’re basically getting two flavors for one step. (Yes, even on a Tuesday night.)
- Herb-Packed Punch: That fresh parsley isn’t just garnish—it brightens the whole thing. Sauté it with the garlic at the end, and suddenly you’ve got this herby, savory depth that makes the filling taste like it simmered for hours. (Spoiler: It didn’t.)
- Double-Duty Dinner: Make a big batch, stuff the cannelloni, and still have leftovers for lunches. Or halve the recipe and freeze half for when you’re too tired to cook. Honestly, it’s the kind of meal that works for date night and lazy Sundays.
- Budget Magic: Ground pork stretches the beef, so you’re feeding a crowd without breaking the bank. Plus, onions and garlic are cheap staples—this is the recipe I turn to when I need hearty, filling food that doesn’t cost a fortune. (My wallet thanks me.)
Step-by-step instructions for beef and pork cannelloni
Here's how to build these hearty, layered cannelloni with rich meat filling and creamy cheese twists.
🍳 Step 1: Brown the Meat Filling
Heat the 1 tablespoon olive oil in a large skillet over medium-high heat. Add the 0.75 lb ground beef and 0.5 lb ground pork, breaking it up with a wooden spoon. Cook for 5-6 minutes until the meat loses its raw color and starts to brown.
Push the meat to one side of the pan and add the finely diced yellow onion and minced garlic cloves. Sauté for 2-3 minutes until the onion becomes translucent and the garlic releases its fragrant aroma. This step builds the flavor foundation for your filling.
👨🍳 Step 2: Season and Prepare the Meat Mixture
Return the meat to the pan and stir in the 1.5 teaspoons salt, 0.5 teaspoon black pepper, and 1 teaspoon dried oregano. Cook for another 3-4 minutes until the meat is fully cooked through and any remaining liquid has evaporated.
Remove the pan from heat and stir in the 0.25 cup chopped fresh parsley. Let the mixture cool slightly for 5 minutes before transferring to a mixing bowl. The parsley adds freshness that balances the richness of the meat.
🥘 Step 3: Assemble the Cheese Filling
In a separate bowl, combine the 1 cup room-temperature ricotta cheese, 0.5 cup freshly grated parmesan cheese, and 1 whole large egg. Mix gently with a fork until just combined—don't overmix or the filling will become dense.
Fold in the cooled meat mixture until everything is evenly distributed. The ricotta should be well-coated with the meat juices, creating a cohesive filling that won't fall apart when stuffed into the shells.
🔥 Step 4: Prepare the Tomato Sauce
In a medium saucepan, melt the 2 tablespoons unsalted butter over medium heat. Add the 2 tablespoons tomato paste and cook for 1-2 minutes, stirring constantly, until it darkens slightly and releases its rich flavor.
Pour in the 14.5 ounces canned crushed tomatoes and bring to a gentle simmer. Add the 0.5 cup heavy cream and continue simmering for 10-12 minutes until the sauce thickens slightly. Season with an additional 0.5 teaspoon salt if needed. This sauce should be smooth and velvety, ready to coat each cannelloni perfectly.
🥘 Step 5: Assemble and Bake the Cannelloni
Preheat your oven to 375°F. If using fresh cannelloni shells, boil them according to package instructions until al dente, then drain well. Spread a thin layer of tomato sauce in a 9x13-inch baking dish to prevent sticking.
Fill each shell with about 1-2 tablespoons of the meat-cheese mixture, then roll it up gently. Place the filled shells seam-side down in the baking dish, tucking them snugly together. Pour the remaining sauce over the top, covering the shells completely.
⏰ Step 6: Bake to Golden Perfection
Cover the baking dish tightly with aluminum foil and bake for 25 minutes. Remove the foil and bake for another 10-15 minutes until the sauce bubbles and the tops are golden brown. The edges should be slightly crisped while the centers remain creamy.
Let the cannelloni rest for 5 minutes before serving. This resting time allows the filling to set slightly, making it easier to slice and serve. Garnish with additional grated parmesan and fresh parsley if desired.
Pro Tips For Making Beef And Pork Cannelloni
- CRUSH THE ONIONS: Fine dice that onion—no bigger than a pea—or it’ll turn to mush while the meat cooks. I learned this the hard way after ending up with a watery filling that made my cannelloni soggy. A sharp knife and quick chops save you from regret later.
- SWEAT THE MEAT LOW: Start the beef and pork on medium-low heat with a splash of water or broth. Too much heat too soon and you’ll end up with dry, rubbery filling. Let it render slowly—this keeps the texture juicy and rich, which matters when it’s tucked inside pasta.
- SALT THE FILLING LIKE IT’S WORTH IT: Season the meat mixture aggressively with salt before it finishes cooking. The flavors need time to meld, and cannelloni filling can’t be fixed after assembly. Aim for at least 1.5 teaspoons per pound of meat—yes, even if it tastes “too much” now.
- STIR IN THE PARSLEY LATE: Add the fresh parsley in the last 30 seconds of cooking—it’s delicate and wilts fast. Overcooking it turns the filling bitter, and you want that bright green color to peek through when you slice into the finished dish. (Pro move: Pulse it in a food processor first for even distribution.)
Perfect pairings for beef and pork cannelloni
Classic Tomato Sauce
This tomato-based sauce is my go-to for cannelloni—it's simple but packed with depth. I use San Marzano crushed tomatoes for their natural sweetness and low acidity, which pairs beautifully with the meat filling. For extra richness, I stir in ½ cup heavy cream at the end, creating a velvety texture that coats every bite. 🍅
Creamy Béchamel Twist
For a lighter but equally delicious option, swap the tomato sauce for a béchamel sauce made with 2 tbsp butter, 2 tbsp flour, and 1 cup whole milk. Season with ½ tsp nutmeg and a pinch of white pepper for a subtle, elegant flavor. This version feels luxurious and works especially well with the pork in the filling.
Wine Pairings
A Chianti Classico or Barolo from Piedmont complements the rich flavors perfectly. The medium-bodied reds cut through the creaminess while enhancing the meaty notes. For a white option, try a Vermentino from Sardinia—its crisp acidity balances the dish beautifully. 🍷
Herb Garnishes
Fresh basil or parsley adds brightness to the dish. I like to sprinkle a handful over the top right before serving to highlight the freshness. For a more robust flavor, try thyme or rosemary—just a few leaves wilted in warm olive oil and drizzled over the top adds an unexpected depth.
Side Dish Harmony
A simple arugula salad with lemon vinaigrette cleanses the palate between bites. I toss 4 cups baby arugula with 2 tbsp olive oil, 1 tbsp fresh lemon juice, and a pinch of sea salt. For a heartier option, serve with garlic bread or roasted seasonal vegetables like zucchini and bell peppers.
Make-Ahead Sauce Tip
Both sauces can be made 1-2 days ahead and stored in the fridge. Reheat gently on the stovetop, stirring occasionally to prevent scorching. If using béchamel, add a splash of milk to thin it out before reheating. This saves time on busy days and ensures you’re always ready to assemble. ⏰
Nutrition facts
Frequently asked questions
Can I use pre-cooked meat for the filling?
Pre-cooked ground beef and pork work perfectly—just make sure they're fully cooked and cooled before mixing with the cheese. For extra flavor, sear the pre-cooked meat in a hot pan with a little olive oil for 2-3 minutes to revive the texture. This method saves time while keeping the filling delicious.
What's the best way to prevent the filling from leaking?
Underfilling the shells is key—use about 1 tablespoon of mixture per shell and roll tightly. Chill the assembled cannelloni for 15 minutes before baking to help the filling set. For extra insurance, brush the edges with beaten egg before baking to create a seal.
Can I make this recipe with fresh pasta shells?
Fresh pasta works beautifully! Boil them just until al dente (2-3 minutes less than package instructions) to prevent overcooking. Drain well and pat dry with paper towels. The slightly firmer texture helps them hold the filling better during baking.
How do I reheat leftovers without drying them out?
Cover with foil and bake at 350°F for 15-20 minutes with a splash of water or broth in the pan. For microwave reheating, cover with a damp paper towel and heat in 30-second intervals until warmed through. This keeps the filling moist and saucy.
What if I don't have ricotta cheese?
Blend 1 cup cottage cheese with 2 tablespoons milk until smooth, then proceed with the recipe. For a richer texture, mix in ¼ cup mascarpone cheese with the cottage cheese. The egg in the recipe helps bind everything together beautifully.