
Main Courses
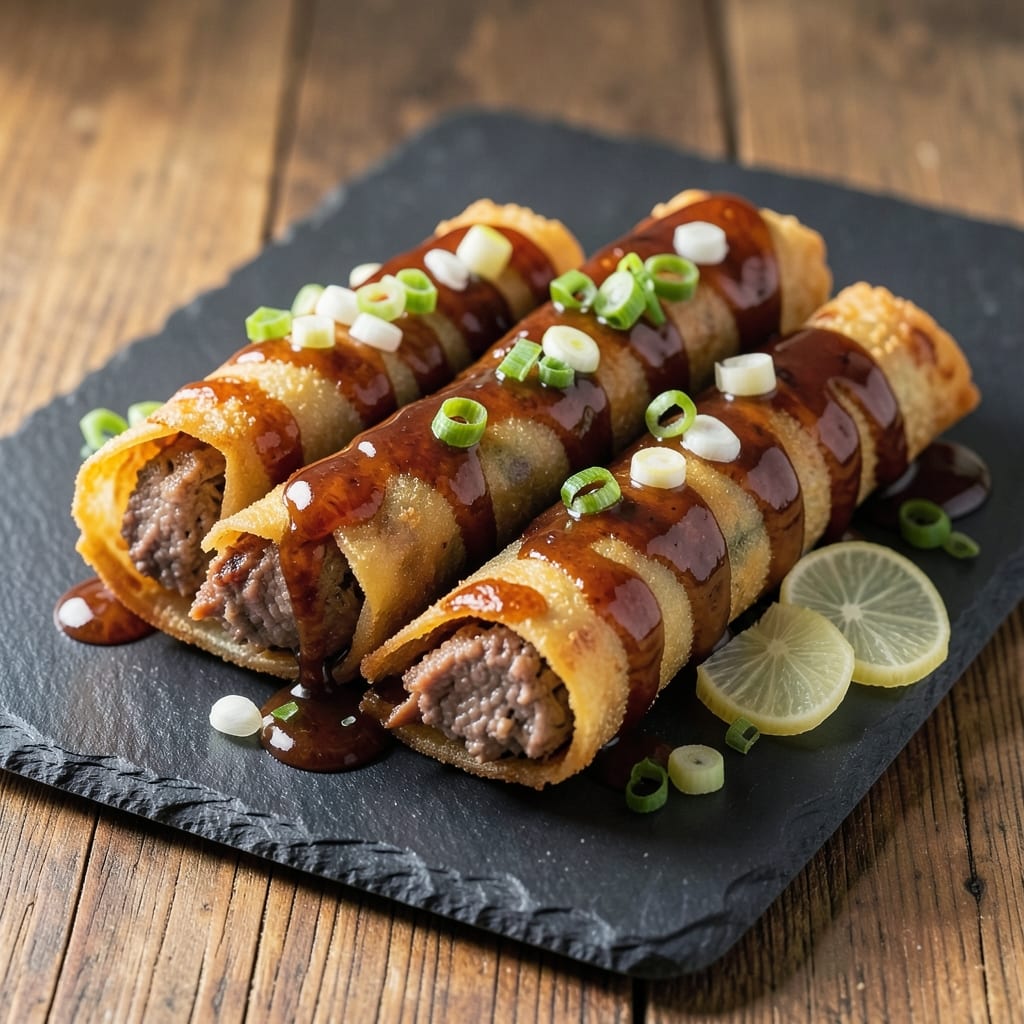
This BBQ pork spring rolls recipe delivers the perfect balance of crispy layers and bold flavors that'll make you crave them every weeknight. 🔥 I remember the first time I bit into one—golden, crunchy, and packed with smoky-sweet pork that practically melts in your mouth. The secret lies in the filling's texture and the rolling technique that ensures that signature crispness without compromising the juicy center.
What sets this recipe apart is the foolproof method for achieving restaurant-quality results at home. We start with ground pork seasoned with a blend of spices that creates depth—just enough heat to complement the tangy BBQ sauce without overpowering it. The spring roll wrappers get their crispy edge through a quick dip in hot oil, a technique I perfected after years of trial and error in my kitchen.
By the time you're done, you'll have crispy, golden-brown spring rolls that shatter with every bite, revealing tender pork and aromatic herbs inside. The tangy dipping sauce ties everything together, cutting through the richness while adding another layer of flavor. This is the kind of dish that feels special enough for company but simple enough for a quick weeknight dinner.
Serve with a side of pickled vegetables for balance, or double the batch for game day—these disappear faster than you can say "second helping." The beauty of this recipe is its versatility: you can deep-fry for classic crispiness or air-fry for a lighter version. Let's get started on making these crowd-pleasing bites!
Ingredients for bbq pork spring rolls
These bold flavors and crispy textures come together with just 15 simple ingredients.
| Ingredient | Amount | Notes |
|---|---|---|
| Ground Pork 🐷 | 1 ½ lb | 80/20 fat ratio preferred |
| Spring Roll Wrappers 🍱 | 12 pieces | Rice paper, 8-inch size |
| BBQ Sauce 🍅 | ½ cup | Store-bought or homemade |
| Green Onions 🧅 | 4 whole | White and green parts separated |
| Fresh Ginger 🧄 | 1 ½ tbsp | Finely grated, fresh preferred |
| Garlic Cloves 🧄 | 4 cloves | Minced, fresh preferred |
| Sesame Oil 🫒 | 1 tbsp | Toasted for aroma |
| Soy Sauce 🥢 | 2 tbsp | Light or dark preferred |
| Oyster Sauce 🍜 | 1 tbsp | Traditional for umami |
| Vegetable Oil 🫒 | 3 cups | For frying, high smoke point |
| Salt 🧂 | ½ tsp | Kosher or sea salt |
| Black Pepper 🌶️ | ¼ tsp | Freshly ground preferred |
| Lime Juice 🍋 | 2 tbsp | Freshly squeezed |
| Honey 🍯 | 1 tbsp | For dipping sauce sweetness |
| Cilantro 🌿 | ¼ cup | Chopped, stems removed |
The ground pork is where the magic starts—80/20 fat ratio gives you that juicy, flavorful bite you crave. Costco or Trader Joe's usually have the best prices for bulk pork, and look for packages labeled with the fat percentage. Fresh ginger and garlic are non-negotiable here; the frozen stuff just won't cut it for that bright, fresh flavor. Spring roll wrappers can be found in the Asian foods aisle—King Noodle or Lotus brands are my go-tos, but any rice paper wrapper will work. Just make sure they're fresh; wrappers that feel stiff or dry won't roll properly.
No oyster sauce? Substitute with an extra tablespoon of soy sauce plus a dash of fish sauce—it'll give you that umami punch. Running low on sesame oil? Toasted sesame seeds mixed with neutral oil work in a pinch, though they won't have the same aroma. The BBQ sauce can be store-bought (I love Sweet Baby Ray's for its balance of sweet and smoky), but if you're feeling ambitious, a quick blend of ketchup, molasses, and spices does the trick. For the dipping sauce, if you're avoiding honey, maple syrup works beautifully—just reduce it slightly to get the right consistency.
Keep your spring roll wrappers sealed in the fridge until ready to use—they dry out fast once opened. The cooked filling can be prepped ahead and refrigerated for up to 2 days, but don't roll them until you're ready to fry or air-fry. For the dipping sauce, it keeps in the fridge for 5 days, but trust me, it'll disappear faster than you can say "second helping." If you're double-batching for a crowd, freeze the uncooked rolls on a tray before transferring to a bag—they'll reheat perfectly in the oven or air fryer.
Why You'll Love This Recipe
- No Fuss Assembly: I swear by these—just mix the pork with BBQ sauce, ginger, and a splash of water until sticky. Wrap them while watching TV, no precision required. (Yes, they’ll still taste amazing.)
- Smoky-Sweet Magic: That BBQ sauce isn’t just a glaze—it caramelizes into a sticky, slightly crispy shell when fried, while the ginger cuts through the richness. Honestly, the first bite makes you question why you ever ate plain spring rolls.
- Party or Pantry: Double the batch and freeze half. They’re my go-to for game day, potlucks, or lazy Sundays when I’m too tired to plan. Reheat in the air fryer—crispy again in minutes.
- Budget Crunch Savior: Ground pork stretches far, wrappers are cheap, and you’re using pantry staples. Leftovers? Even better—they reheat like a dream, so I make a big batch and snack all week. (My wallet thanks me.)
Step-by-step instructions for BBQ pork spring rolls
Here's how to build golden layers and tangy dipping sauce that'll make these spring rolls irresistible.
👨🍳 Step 1: Prepare the Flavor-Packed Pork Filling
In a large bowl, combine the 1.5 lb ground pork, 0.5 cup BBQ sauce, 2 tbsp soy sauce, 1 tbsp oyster sauce, 1.5 tbsp finely grated fresh ginger, 4 minced garlic cloves, 0.5 tsp salt, and 0.25 tsp black pepper. Mix gently with your hands until just combined—you want the pork to stay slightly chunky, not overworked.
Here's the thing—don't skip the hand-mixing. The fat from the pork needs to stay distributed for that perfect crispy texture later. Once mixed, cover the bowl and refrigerate for 15 minutes to let the flavors meld. This chilling step also helps the filling hold together better when you roll them up.
👨🍳 Step 2: Assemble the Spring Rolls with Precision
Fill a shallow bowl with warm water—just enough to cover the bottom. Working with one spring roll wrapper at a time, dip it in the water for 5-10 seconds until pliable but not soggy. Lay it flat on a clean surface and place 2 tablespoons of the pork mixture near the bottom edge.
Now for the technique: fold the bottom corner over the filling, then fold in the sides, and finally roll tightly toward the top. The key is keeping the filling centered—if it's too close to one edge, your roll will bulge and tear during frying. Seal the top edge with a tiny dab of water to help it stick. Repeat until all 12 pieces are assembled.
🔥 Step 3: Fry to Crispy Perfection
Heat 3 cups vegetable oil in a deep skillet or Dutch oven to 350°F—use a thermometer for accuracy. Fry 3-4 spring rolls at a time for 2-3 minutes until golden brown on all sides. You'll know they're ready when they float—this means the interior is fully cooked through.
Don't overcrowd the pan or the oil temperature will drop, leading to greasy instead of crispy results. Transfer fried rolls to a paper towel-lined plate to drain excess oil. Keep them warm in a 200°F oven while you fry the remaining batches. Real talk: these should be crispy enough to stand up to a toothpick when you're done.
🥘 Step 4: Make the Tangy Dipping Sauce
In a small bowl, whisk together 2 tbsp lime juice, 1 tbsp honey, 1 tbsp toasted sesame oil, and 0.25 cup chopped cilantro. Taste and adjust—you might want to add a splash more lime for brightness or a drizzle of honey for sweetness. The sauce should balance tangy, sweet, and herby notes perfectly.
Here's where it gets fun—let the sauce sit for 5 minutes before serving. This gives the flavors time to marry together. The lime juice will mellow slightly while the honey and sesame oil deepen in aroma. Serve immediately with the crispy spring rolls for maximum crunch and dipping action.
🍽️ Step 5: Serve with Confidence
Slice each spring roll diagonally into 3-4 pieces for easy serving. Arrange on a platter with the tangy dipping sauce in the center. Garnish with extra chopped green onions and cilantro for freshness. The contrast of crispy exterior with tender, flavorful pork inside is what makes these spring rolls so addictive.
Pro tip: Serve immediately while everything is at its peak—crispy wrappers and warm filling. If you need to reheat, do it in a 350°F oven for 5-7 minutes to restore crispiness. These taste even better the next day when the flavors have had time to develop, but that's no excuse to skip the fresh ones tonight!
Pro Tips For Making Bbq Pork Spring Rolls
- Boil Wrappers 30 Seconds: I used to follow the package instructions and boil those wrappers for the full 20-30 seconds, but they’d turn soggy before I even got to rolling. Now I just dip them in hot water for 10-15 seconds, pat them dry with a paper towel, and they stay crisp enough to handle—no more sticky messes. (Yes, even if you're impatient like me.)
- Grind Ginger Fine: That chunky ginger you grate straight from the root? It’ll sit like a rock in your filling. Pulse it in a food processor until it’s almost paste-like, then mix it into the pork. I learned this the hard way—my first batch had visible ginger shards, and it threw off the texture every time I took a bite.
- Sear Pork First: Skip the raw pork-and-BBQ-sauce mix straight into the pan, and you’ll end up with a gray, saucy blob. Instead, brown the pork in a dry skillet for 2-3 minutes until it loses its pinkness, then add the BBQ sauce. The Maillard reaction gives the filling depth that store-bought mixes can’t match—it’s the thing that matters most.
- Wrap Tight, Fold Loose: Tightly sealed spring rolls? They’ll burst open when frying. Loose rolls? They’ll unravel. The fix: roll them snug but not airtight, then fold the top corner down like a tiny envelope to keep everything contained. Pro tip from my grandmother: brush the edges with a tiny bit of water before sealing—it acts like glue. (Does it look weird? Yes. Does it work? Every single time.)
Common mistakes when making perfect results
Overfilling Rolls
I've seen more than a few spring rolls burst open during frying because someone packed in too much filling. The rule is 2 tablespoons per wrapper—any more and you risk tearing the delicate rice paper. I learned this the hard way when my first batch exploded like popcorn in a hot oil bath. 🌶️ Keep the filling centered and roll tightly to prevent bulging. If your mixture looks too loose, chill it for another 10 minutes to help it hold together.
Skipping the Chill Step
Rushing the 15-minute chill for the pork filling is a common mistake that leads to messy rolls. The fat needs time to redistribute and the flavors to meld, otherwise you'll end up with greasy, unevenly seasoned bites. I once made a whole batch without chilling—big mistake. The rolls fell apart during frying, and the pork tasted bland. Trust the process and let it rest.
Wrong Oil Temperature
Using oil that's too cool (below 350°F) results in greasy, soggy spring rolls, while oil that's too hot (above 375°F) burns the outside before the inside cooks. I recommend using a deep-fry thermometer—they're cheap and make all the difference. The rolls should sizzle gently when they hit the oil, not smoke furiously. If you don't have a thermometer, test with a wooden chopstick: if bubbles form around it immediately, the oil's ready. 🔥
Improper Wrapper Handling
Dipping wrappers in water that's too hot makes them soggy and difficult to work with, while water that's too cold causes cracking. The water should be warm to the touch—about 100-110°F. Dip just the corner for 5-10 seconds, then work quickly. I keep a damp towel nearby to wipe my hands frequently, as the wrappers dry out fast. Pro tip: If a wrapper tears, patch it with a tiny dab of water and continue rolling—no one will notice!
Overcrowding the Fryer
Trying to fry too many rolls at once drops the oil temperature dramatically, leading to greasy instead of crispy results. I've seen home cooks stuff their entire batch into a pan, only to end up with soggy, sad spring rolls. The rule is 3-4 rolls per batch, spaced out so they have room to float. Keep the oil at 350°F between batches by adjusting the heat. A Dutch oven is ideal for this—its deep sides prevent spills and maintain even heat distribution. ⚡
Neglecting the Dipping Sauce
Some people skip the dipping sauce entirely or serve it too soon after mixing, missing out on its full potential. The sauce needs 5 minutes to let the flavors meld—this is when the lime juice mellows and the honey deepens. I remember my first batch where I served the sauce immediately, and it tasted flat. Patience pays off here. Also, don't be afraid to adjust the balance of sweet, tangy, and herby notes to your taste before serving.
Nutrition facts
Frequently asked questions
Can I make these spring rolls without deep-frying?
For a lighter version, try air-frying at 375°F for 8-10 minutes, flipping halfway. Spray with a tiny bit of oil first to help crispiness. Or bake at 400°F for 12-15 minutes on a wire rack over a baking sheet—just brush with oil and watch closely to prevent burning. The texture won't be identical, but they'll still be delicious!
How do I store leftover spring rolls?
Keep them crispy by storing uncooked rolls in the fridge for up to 2 days (sealed tightly in plastic wrap). For cooked rolls, reheat in a 350°F oven for 5-7 minutes to restore crispiness. Freeze uncooked rolls on a tray first, then transfer to a bag—they'll reheat perfectly in the oven or air fryer. Pro tip: Reheat from frozen for 12-15 minutes at 400°F.
What's the best way to adjust the spice level?
The recipe balances smoky-sweet BBQ flavors with subtle heat. For more kick, add ½ teaspoon red pepper flakes or 1 teaspoon sriracha to the filling. If you prefer milder flavor, reduce the BBQ sauce slightly (use ¼ cup) and add 1 extra tablespoon honey to the dipping sauce. Always taste the filling before rolling—adjustments are easier before assembly!
Can I use chicken or shrimp instead of pork?
Yes! For chicken, use 1.5 lb ground chicken thigh (more flavor than breast) and reduce cooking time by 30 seconds per side. Shrimp works beautifully too—use 1 lb peeled shrimp, sautéed first with garlic and ginger, then mixed with the other filling ingredients. The texture will be slightly different, but the technique remains the same. Just be gentle when rolling to avoid tearing!
Why did my spring rolls get soggy?
Soggy spring rolls usually mean one of three things: oil temperature too low (below 350°F), overcrowding the fryer, or not draining properly. First, always use a thermometer—oil should sizzle gently when rolls hit. Second, fry in batches of 3-4 rolls with space between them. Finally, drain on a wire rack (not paper towels) to let excess oil drip away. If reheating, use the oven—not microwave!