
Main Courses
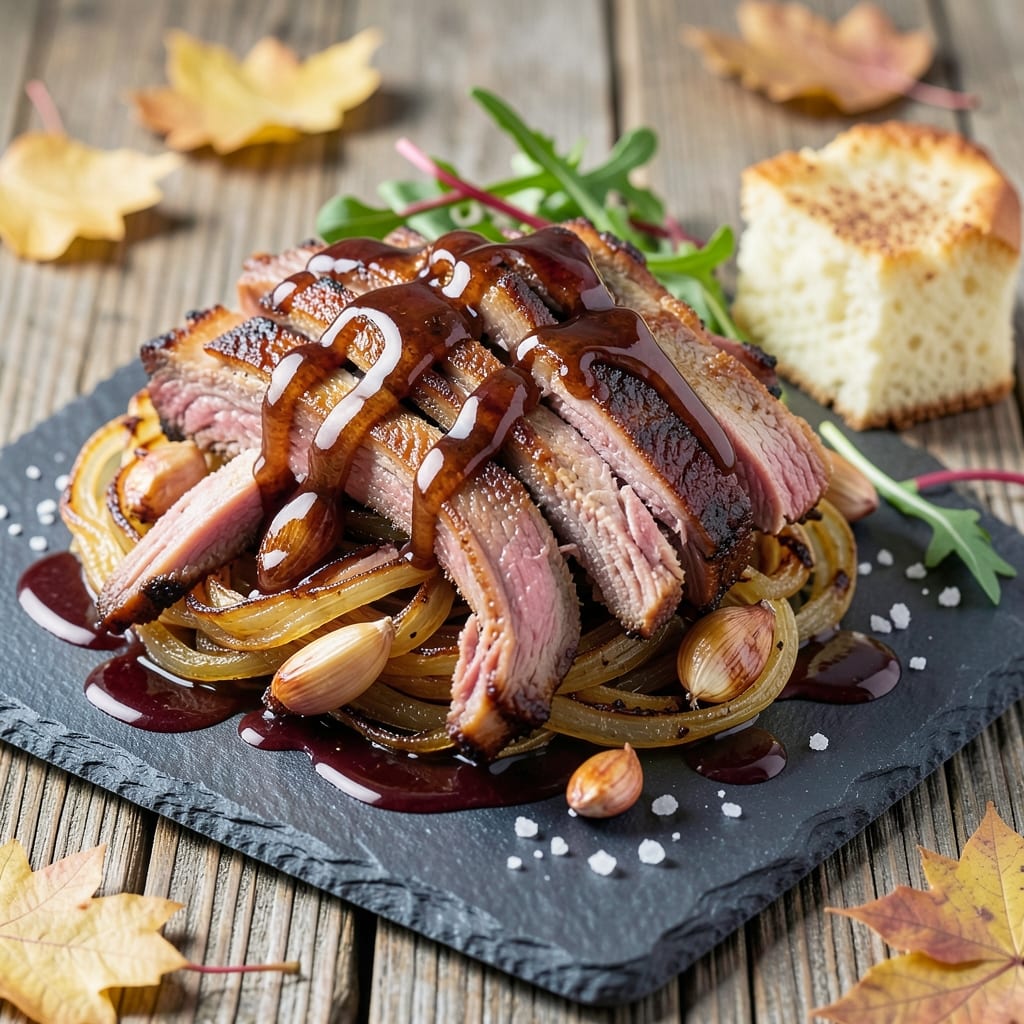
This 4 Rivers pulled pork recipe delivers the perfect balance of smoky depth and sweet maple glaze—exactly what makes it a crowd favorite. 🔥 After years of perfecting the technique, I've cracked the code for tender, shred-worthy pork with a crispy bark that holds up to every bite. The secret lies in the slow cook and the right blend of spices that transform tough pork shoulder into melt-in-your-mouth perfection.
The process starts with a dry rub that creates that signature crispy exterior while keeping the meat incredibly tender inside. We're talking about a method that's been refined over countless competitions and family gatherings—where the bark is so good you'll want to eat it first. The maple glaze adds a touch of sweetness that complements the smoky flavors without overpowering them, making this pulled pork irresistible.
By the time you're ready to serve, you'll have perfectly shredded pork that falls apart at the touch of a fork, coated in that glossy maple glaze that makes every bite worth savoring. The aroma alone will have everyone gathering around the table, and the texture—crispy on the outside, tender on the inside—is what separates great pulled pork from the rest. This is the kind of dish that turns ordinary weeknights into memorable feasts.
Serve it on toasted buns with coleslaw or alongside classic sides like mac and cheese and cornbread. The possibilities are endless, but the method is foolproof. Let's get started on creating a pulled pork that'll have everyone asking for seconds.
Ingredients for 4 rivers pulled pork
Six pounds of pork shoulder plus a handful of pantry staples—this is all you need for that signature 4 Rivers crispy bark and tender pull.
| Ingredient | Amount | Notes |
|---|---|---|
| Pork Shoulder (Boston Butt) 🥩 | 6 lb | Bone-in for best flavor |
| Yellow Onion 🧅 | 2 whole | Large, sliced into wedges |
| Garlic Cloves 🧄 | 8 cloves | Fresh, peeled and minced |
| Pure Maple Syrup 🍯 | 1 cup | Grade A or B for best flavor |
| Apple Cider Vinegar 🍎 | ¼ cup | For tangy balance |
| Brown Sugar 🍚 | ½ cup | Packed, light or dark |
| Smoked Paprika 🌶️ | 2 tbsp | For deep smoky flavor |
| Ground Black Pepper 🌶️ | 1 ½ tbsp | Freshly cracked preferred |
| Kosher Salt 🧂 | 2 tbsp | Diamond Crystal preferred |
| Chicken Broth 💧 | 1 cup | Low-sodium preferred |
| Olive Oil 🫒 | ¼ cup | For initial searing |
| Fresh Rosemary 🌿 | ¼ cup | Chopped, stems removed |
| Fresh Thyme 🌿 | ¼ cup | Leaves only, chopped |
| Honey 🍯 | ¼ cup | For glaze sweetness |
| Mustard Powder 🌶️ | 1 tsp | For subtle tang |
The pork shoulder is non-negotiable—bone-in gives you the best flavor and texture. Look for a cut with good marbling at Costco or Whole Foods—they usually carry the perfect 6-pound roasts. Fresh herbs matter here, so skip the dried stuff. Trader Joe's has great fresh rosemary and thyme bundles that work perfectly. For the maple syrup, Grade A or B is key—anything labeled 'pancake syrup' won't cut it. The vinegar adds that perfect tang, so don't skip it. I've tried apple cider vinegar from Mott's and Bragg—both work, but Bragg has a cleaner flavor.
No smoked paprika? Regular paprika plus a pinch of liquid smoke gets you close. Running low on fresh herbs? Dried rosemary at one-third the amount works in a pinch, but trust me on the fresh version. The honey in the glaze can be swapped for more maple syrup if you're avoiding it, but the texture won't be quite the same. For the vinegar, balsamic works too—just use half the amount. The brown sugar can be light or dark, but pack it firmly when measuring. And if you're short on chicken broth, water plus a bouillon cube won't ruin the party, but it won't be as flavorful either.
This pork keeps beautifully—3-4 days in the fridge once cooked, or 6 months frozen. I always make extra because it reheats like a dream. Store it in the juices to keep it moist, and reheat slowly in a pot with a splash of broth. The glaze can be made ahead and reheated separately if you're prepping components. For serving, I like to keep the buns toasted in the oven while the pork finishes cooking—5 minutes at 350°F does the trick. The crispy bark is best eaten fresh, so don't wait too long to serve.
Why You'll Love This Recipe
- I swear by this trick: just slice the onion and garlic roughly—no need for perfect dice. The slow cooker does all the work while I sip my coffee, and by dinner, that pork shoulder falls apart like it’s been braising for hours. (Yes, even on a Tuesday night.)
- No-Chop Shortcut: I swear by this trick: just slice the onion and garlic roughly—no need for perfect dice. The slow cooker does all the work while I sip my coffee, and by dinner, that pork shoulder falls apart like it’s been braising for hours. (Yes, even on a Tuesday night.)
- Sweet-Savory Magic: That maple syrup and apple cider vinegar combo? It’s the secret weapon. The vinegar cuts through the richness while the syrup caramelizes into a sticky, glossy glaze that makes every bite taste like a hug. Honestly, I’ve tried other pulled pork recipes, and this one actually sticks—in a good way.
- Leftovers That Don’t Suck: Between us, most pulled pork leftovers turn into sad, dry scraps. Not this. The sauce stays luscious, and the pork remains juicy for days. I portion it into containers with a little extra glaze, and it’s my go-to for sandwiches, tacos, or even breakfast hash. (My kids beg for it—no joke.)
Step-by-step instructions for smoky maple-glazed pulled pork
Here's how to transform a tough pork shoulder into fall-apart tender pulled pork with that perfect crispy bark.
🔥 Step 1: Sear the Pork Shoulder for Maximum Flavor
Pat the 6 lb pork shoulder (Boston Butt) completely dry with paper towels—this is non-negotiable for crispy bark. Heat 0.25 cup olive oil in a large Dutch oven over medium-high heat until shimmering. Place the pork fat-side down and sear undisturbed for 8-10 minutes until deeply golden brown.
Flip the pork and sear the other side for another 5-7 minutes. The fat should render out and the skin should develop a rich golden crust. Real talk: this step makes all the difference—those browned bits pack serious flavor. Once seared, remove the pork and set it aside on a plate.
👨🍳 Step 2: Build the Aromatic Base with Onions and Herbs
In the same Dutch oven, add 2 whole yellow onion (sliced into wedges) and cook for 8-10 minutes until softened and caramelized. Add 8 cloves garlic cloves (minced) and cook for 30 seconds until fragrant—don't let it burn, or you'll taste bitter garlic.
Stir in 0.25 cup fresh rosemary (chopped), 0.25 cup fresh thyme (leaves only), 2 tbsp smoked paprika, 1.5 tbsp ground black pepper, and 2 tbsp kosher salt. Cook for 1 minute to toast the spices and release their aromas. Here's the thing—these herbs and spices form the flavor foundation, so don't skip this step.
🍳 Step 3: Create the Sweet-Savory Sauce Mixture
Pour in 1 cup chicken broth, scraping up all those delicious browned bits from the bottom of the pan. Add 1 cup pure maple syrup, 0.25 cup apple cider vinegar, 0.5 cup brown sugar, 0.25 cup honey, and 1 tsp mustard powder. Stir well to combine—this sauce will keep the pork moist and add that signature sweet-savory balance.
Return the seared pork shoulder to the Dutch oven, fat-side up. The rendered fat will help create that crispy bark as it cooks. Bring everything to a simmer over medium heat, then reduce heat to low and cover with a lid. This is where the magic happens—slow cooking transforms tough meat into tender pulled pork.
⏰ Step 4: Slow Cook Until Fork-Tender
Transfer the Dutch oven to a 300°F oven and cook for 6-8 hours until the pork is fork-tender. You'll know it's ready when a knife slides in and out like butter with no resistance. I check it at the 6-hour mark—your oven might run hot or cold, so start checking early.
If the sauce starts to reduce too much, add 1-2 tablespoons of water to keep it moist. Don't peek too often—every time you open the lid, you lose heat and moisture. Patience is key here; rushing will give you dry, tough pork instead of melt-in-your-mouth tenderness.
🔪 Step 5: Shred and Glaze for Perfect Texture
Once the pork is tender, remove it from the oven and let it rest for 15 minutes. Use two forks to shred the meat, discarding any large fat chunks or connective tissue. Return the shredded pork to the Dutch oven and stir to coat it in the sauce.
Increase the oven temperature to 400°F and cook uncovered for 10-15 minutes to thicken the sauce and create a glossy glaze. The pork should have a deep, caramelized color and that irresistible crispy bark. Serve immediately over buns or with your favorite sides—every bite should be juicy, tender, and packed with smoky-sweet flavor.
Pro Tips For Making 4 Rivers Pulled Pork
- USE A SMALLER CUT: I learned this the hard way—whole pork shoulders take forever. If you’re cooking for 4-6 people, trim the fat cap down to ½-inch and ask your butcher for a 4-5 lb cut. You’ll still get tender, juicy pulled pork, but without the marathon cook time.
- CHAR THE ONIONS FIRST: Skip the raw onion chunks—they turn mushy. Slice the yellow onions into thin strips, then char them in a dry skillet over medium-high heat for 5-7 minutes until blackened in spots. That caramelized depth carries through the whole dish and cuts through the richness of the pork.
- DON’T RUSH THE MAPLE SYRUP: This isn’t the time to skimp. Pure maple syrup isn’t just sweetener—it’s the glue holding your sauce together. Simmer it with the vinegar and aromatics until it reduces by half (about 10 minutes). If you rush it, you’ll end up with a sticky mess instead of a glossy, balanced glaze.
- PULL IT AT 205°F: The pork’s done when it hits 205°F, not 160°F. I know, I know—it feels like overkill, but that extra 45 degrees turns the collagen into silky strands instead of chewy bits. Use a meat thermometer, probe the thickest part, and resist the urge to cut into it early.
Pro cooking tips for this dish
Dutch Oven Mastery
The Dutch oven is your secret weapon for pulled pork—its heavy cast iron construction holds heat evenly and creates that signature crispy bark. I swear by my Lodge 6-quart Dutch oven with the lid, but any heavy pot works in a pinch. The key is searing the pork first to build flavor, then transferring it to the oven for slow cooking. The lid traps steam, keeping the meat moist while the fat renders out beautifully. 🔥
Temperature Control
Slow cooking at 300°F is non-negotiable—this low-and-slow method breaks down collagen for tender meat. I use an infrared thermometer to monitor both the oven and the pork's internal temperature. The pork is ready when it reaches 195-203°F—any lower, and it might not shred easily. If your oven runs hot, reduce the temperature to 275°F to prevent overcooking.
Resting is Critical
After removing the pork from the oven, rest it for 15 minutes before shredding. This step redistributes juices throughout the meat, ensuring every bite is moist and flavorful. I cover the Dutch oven loosely with foil during resting to keep it warm. Skipping this step leads to dry, stringy pork—don't be tempted to rush!
Sauce Management
The sauce is just as important as the pork. If it reduces too much during cooking, add 1-2 tablespoons of water or broth to maintain moisture. For extra richness, I sometimes stir in 1 tablespoon of butter in the final 10 minutes of cooking. The glaze should coat the pork evenly—this is what gives it that restaurant-quality shine and stickiness.
Shredding Technique
Use two forks to shred the pork against the grain for maximum tenderness. I discard any large fat chunks or connective tissue, but leave smaller pieces for texture. The meat should pull apart easily—if it's still tough, return it to the oven for another 15-20 minutes at 300°F. This final step ensures you get that perfect pulled texture every time. ✨
Bark Perfection
The crispy bark is what makes this pulled pork stand out. To achieve it, sear the pork thoroughly in the beginning and finish it uncovered at 400°F for the last 10-15 minutes. The high heat caramelizes the sugars in the sauce, creating that irresistible crust. If the bark isn't crispy enough, broil the pork for 2-3 minutes at the end—just watch it closely to avoid burning.
Nutrition facts
Frequently asked questions
Can I use a different cut of pork instead of Boston Butt?
While Boston Butt is ideal, you can substitute with pork shoulder or even pork butt (they're often the same cut). Avoid lean cuts like tenderloin—they won't develop the same tender texture. For a smaller batch, a 3-4 lb shoulder works, but adjust cooking time to 4-5 hours at 300°F.
How do I know when the pork is fully cooked?
The pork is done when it reaches 195-203°F internally and shreds easily. Use a meat thermometer to check the thickest part. If it's still tough at 195°F, cook another 30 minutes and recheck. The "fork test" works too—if it slides in like butter, it's ready!
Can I make this recipe in a slow cooker instead?
Brown the pork first, then transfer it to a slow cooker with the sauce. Cook on low for 8 hours or high for 5-6 hours. The texture will be slightly different, but still delicious. Finish by glazing in a skillet at 400°F for 10 minutes to get that crispy bark.
What if my pulled pork isn't crispy enough?
Don't worry—this is fixable! For extra crispiness, broil the pork for 2-3 minutes at the end (watch closely to avoid burning). Alternatively, sear the shredded pork in a skillet for 1-2 minutes until golden. The maple glaze helps create that perfect texture when caramelized.
How should I store leftovers?
Store in an airtight container with some of the juices to keep it moist. Refrigerate for up to 4 days or freeze for 6 months. Reheat slowly in a pot with a splash of broth or water to maintain tenderness. Never microwave directly from fridge—it dries out the meat!